Tuesday, February 28, 2012

Striped 'Mariana' Purse- Part 1 of 2

Using a modified 'Valentine Swap' purse resist...


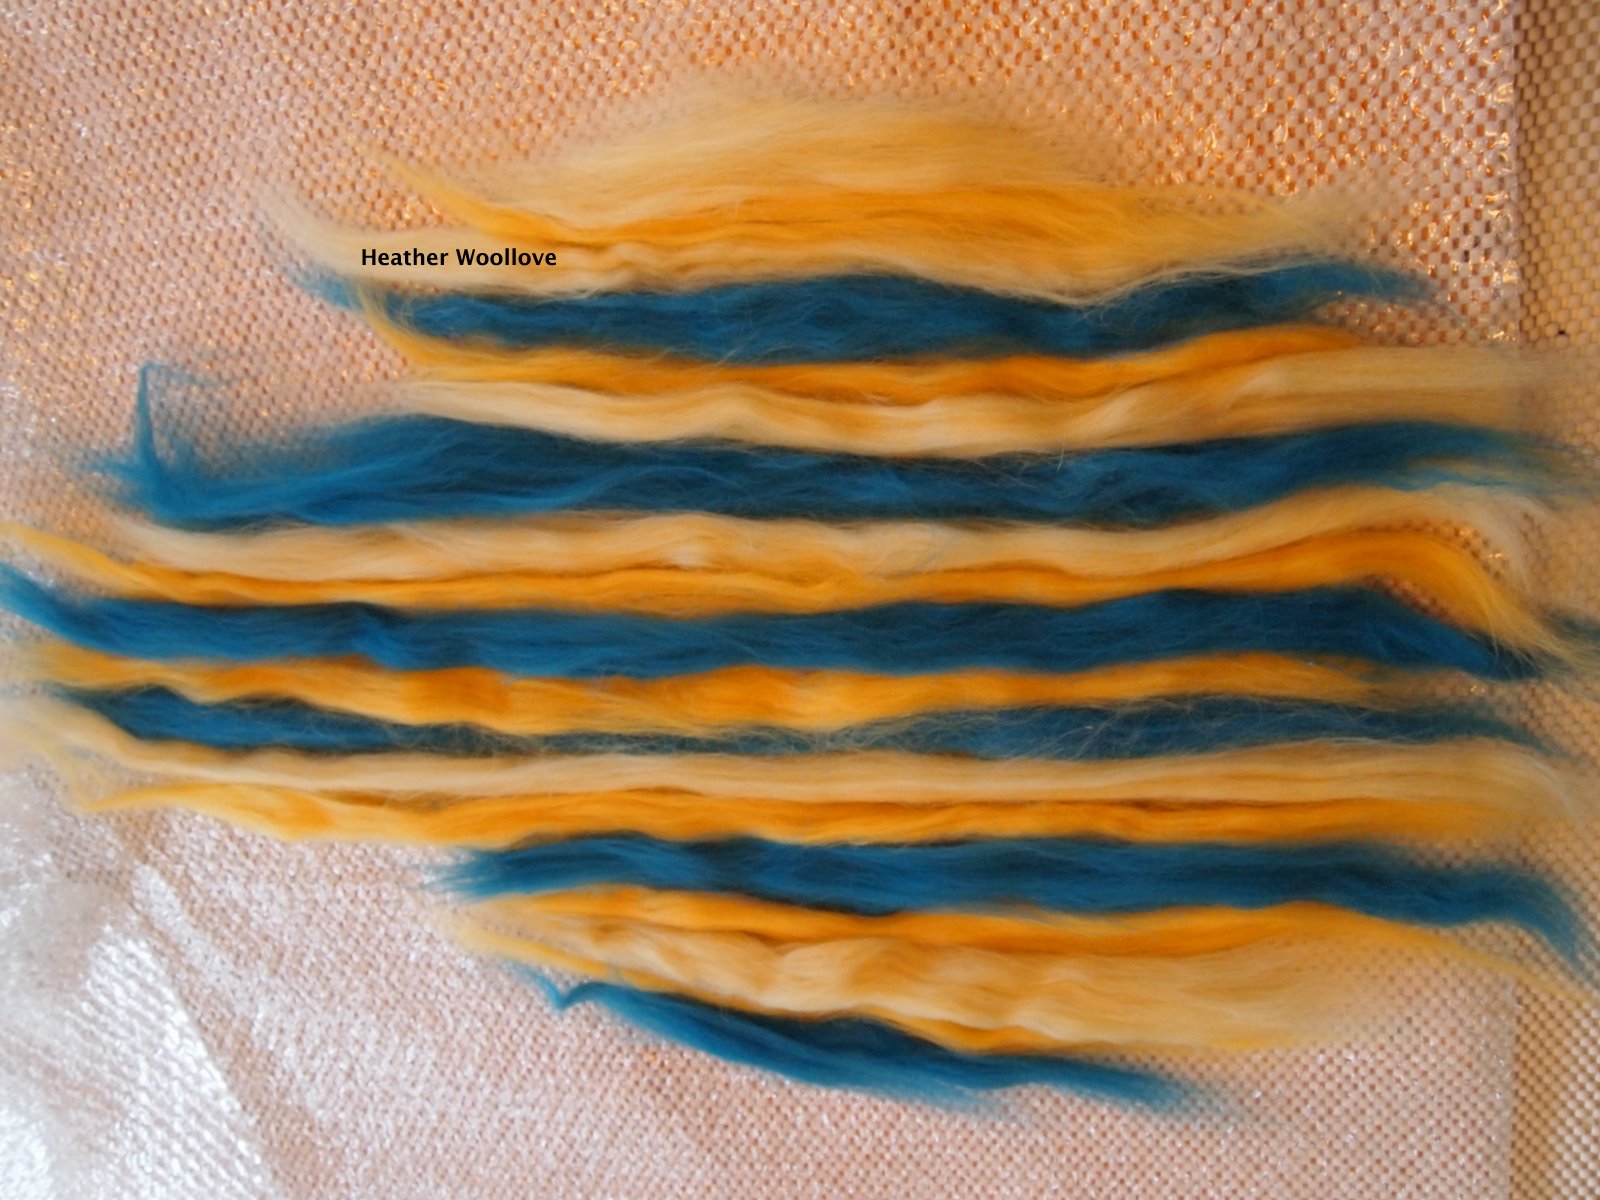
...laying out uneven stripes of roving on side one...


...and side two.


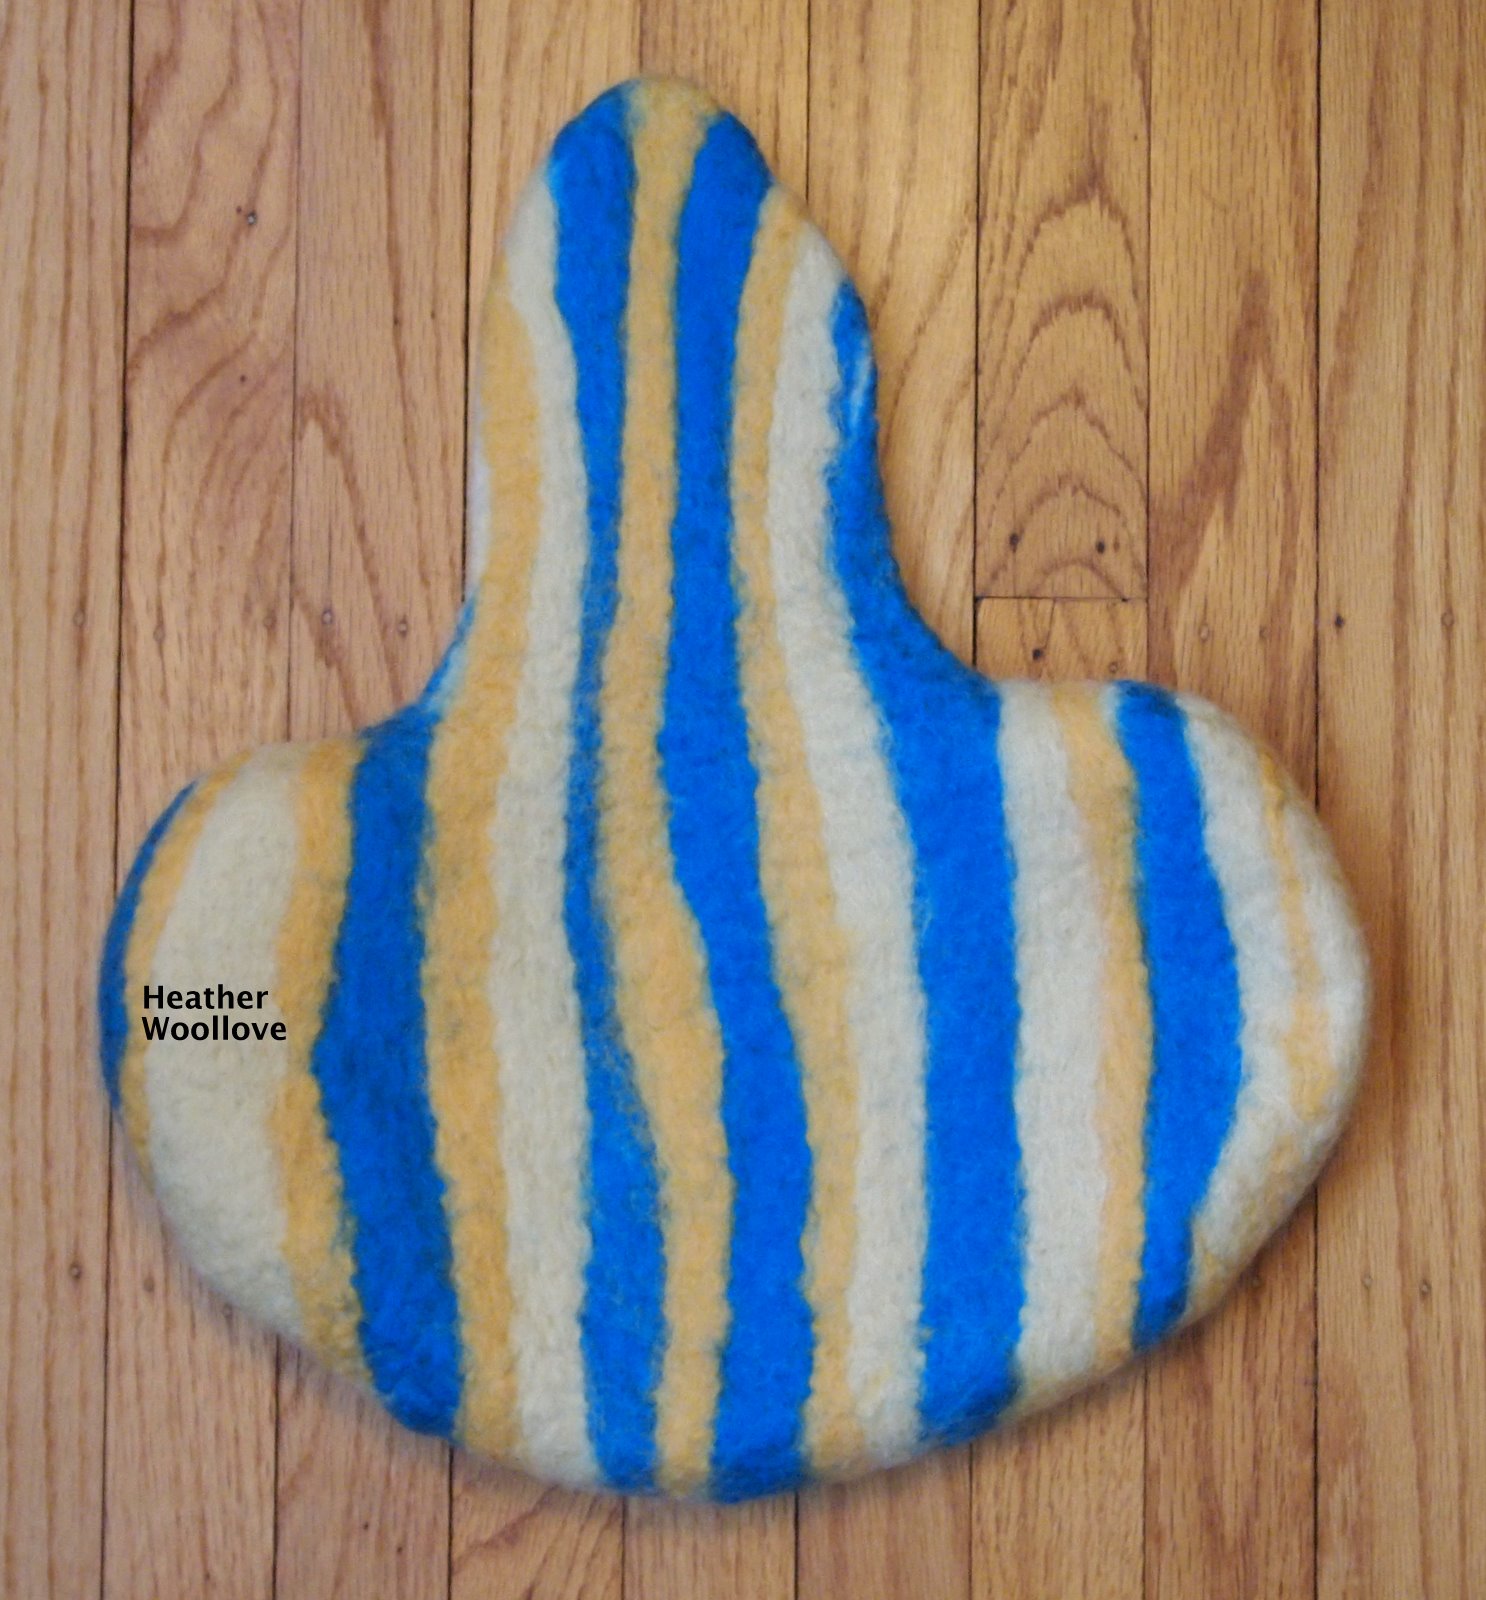
The fully felted and dried piece with resist removed (side one)...


...and side two.


Stitching around the flap edges prior to trimming...


...and after trimming.


Stitching the flap into a pleated 'scout neckerchief' shape.


With every new purse resist that I devise...

...it's fun to try at least one additional variation.

I decided to modify my Valentine Swap purse slightly...

...and finish a belated Christmas gift in the process!

I knew what colors I wanted to use...

...and decided to try a layout based on the incredible work of my friend, Mariana.

I've always admired the way that she lays out roving...

...with wide and thin irregular stripes that just 'pop' with color.

So, after covering the resist with a couple of layers of white roving...

...I added stripes of blue, cream and yellow in various widths.

Next time: the finished bag...

...with cunning little leather details. :)

Posted by Picasa

Sunday, February 26, 2012

American Craft Council Show- Baltimore 2012


Elizabeth (Liz) Rubidge of The Felted Garden


Barbara Poole of B. Felt


Joan Berner and I having a happy mini-reunion in her booth


Jenne Giles of Harlequin Feltworks


...and because I neglected to take a photo of Lisa Klakulak, herself...

...here's one of the fantastic earrings that I purchased from her, instead! :)


Oh, what a day we had yesterday!!!

My guy and I left for Baltimore early in the morning...

...so as to arrive just as the doors opened at the American Craft Council Show.

It was held in the Baltimore Convention Center...

...and it was absolutely ginormous!!

There were booths selling enamelware and repurposed 'greencraft'...

...pottery, jewelry and art glass...

...furniture, lighting, mixed media, and wood...

...but, as you might imagine, I was really there for the fiber arts!!!

I was privileged to meet several blog friends and 'felt icons' in person...

...and a friend-of-a-friend who is now a friend of mine, too. :)

I also got to spend some time with a dear 'Felters Fling' classmate of mine, Joan Berner...

...and it was absolutely wonderful, seeing her again.

Pewter artist, Rosalie Sherman, was there as well...

...whom you might remember from this post of mine.

(I noticed that my guy 'hung back' a bit at her booth while I walked ahead...

...so I'm hoping for another whimsical pewter creature on our anniversary next month.) :)

One of my best friends in the whole world joined us, mid-show...

...and we ended the day with yummy crab cakes at Phillips Seafood in the Inner Harbor.

Happy, happy me!!

Posted by Picasa

Friday, February 24, 2012

Winter Headband Tutorial (More Sewing)


Cutting one pattern piece in felt...


...and one in chenille.


Pinning the two layers together for stitching...right sides facing each other.


After sandwiching in a hair elastic and sewing the layers together (leave a small gap)...

...turning the piece right-side-out.


Flattening and straightening the piece (be sure to tuck in the edges of the un-sewn gap).


After top-stitching.


Two finished headbands (one in fleece and one in felt)...


...with re-purposed buttons.

Before the winter slips away entirely...

...I wanted to share this quick and easy sewing project with you.

The idea came from my middle daughter...

...who saw a similar headband made from a knitted material.

To make the oval paper pattern...

...measure around your head as if the tape measure were the headband...

...and decide how wide you would like it to be as well.

(This pattern is 22 inches by 4 inches at its widest point.)

Cut one pattern piece in fleece or felt...

...(an old woolen sweater that's been fulled in the dryer would also work well)...

...and one in chenille or another 'fluffy' fabric.

Pin the two pieces together, right sides together...

...and sandwich in a thick hair elastic at one end.

Sew around the headband, leaving a small space for turning...

...and turn the headband right side out.

Straighten the seams and flatten the piece...

...then top-stitch all around, very close to the edge.

Try it on for size and to determine the button placement...

...then sew a medium to large button to the non-elastic end.

Voila...

...a soft and cozy headband that won't wreak havoc on your hair-do! :)

Posted by Picasa

Wednesday, February 22, 2012

Quilt Design Drawstring Bag- Part 2 of 2

The finished, dried back side of the bag...


...and the front.


Making a button-hole for the drawstring.


Pulling ribbon through the sewn-on casing.


The completed bag front...


...and back.


With long grosgrain ribbon ties...


...in mix-and-match colors!

For a change, I made a bag that was not intended for use as a purse...

...but as a storage bag for my camera cord and recharger.

It reminds me a bit of a Victorian reticule...

...but in a larger size (11 X 12.5-inches). :)

I used wide satin ribbon for the drawstring casing...

...sewing it onto the felt along the ribbon edges.

The satiny finish makes the drawstring close very smoothly...

...plus, the inside of the bag looks pretty, too! :)

I threaded two different colors of grosgrain ribbon through the casing...

...to provide long handles for hanging.

Posted by Picasa

Monday, February 20, 2012

Quilt Design Drawstring Bag- Part 1 of 2


Copying a free-motion quilting pattern onto my resist...


...and tracing the design with pencil roving.


A different design for side two.


Covering the pencil roving with orange(!) wool.


You'll notice that I'm working inside-out again. :)


The fully felted bag (front side)...


...and back.


My friend, Linda's niece, Bethany Pease, is a long-arm quilting marvel...

...and she has published a book called "Modern Quilting Designs: 90+ Free-Motion Inspirations".

It's a book of beautiful free-motion quilting patterns, many of which look like elaborate doodles...

...and some are even simple enough to translate into felt!

With Bethany's permission, Linda sent me a few of the less intricate designs...

...and I put on my 'thinking cap'! :)

I decided to choose two patterns and make a two-sided bag...

...working inside-out (of course!!).

I traced the design onto the resist with a permanent marker...

...then covered it with 'soap glue' prior to laying out the pencil roving.

For the second side, I 'eyeballed' the design, rather than copying it outright...

...and used the same lay-out technique.

After covering the resist with layers of wool roving...

...I felted the piece until it was finished...

...cutting out the resist mid-way through.

Next time: the finished bag...

...with a grosgrain ribbon drawstring casing!


Posted by Picasa

Saturday, February 18, 2012

Leather-Soled Wet Felted Slippers


Laying out a pencil roving design...


...and covering it with layers of variegated wool roving.


Mid-felting...separating the slippers and removing the resist.


Cutting pieces of leather for the soles...


...checking the fit...


...and punching holes in the pink leather.


The finished slippers...


...with their well-protected bottoms!


My daughter asked me to make her another pair of slippers recently...

...since the ones that she's been wearing had worn through in spots.

I decided to make this pair a combination of looks and strength...

...like a ballerina in steel-toed boots! :)

I used the usual resist and layout...

...and added a bit of color with variegated pencil roving.

When they were fully felted and dry, I drew templates for split soles...

...and cut them from a piece of hand-dyed leather.

To make them easier to stitch, I punched holes into the leather...

...and used a strong beading thread (Silamide) to attach them.

Hopefully, these will wear a bit better than the last pair! :)

Posted by Picasa