Saturday, August 30, 2014

Bunny Sample Tote

Adding a needle-felted eye to Deb's pre-felt bunny...


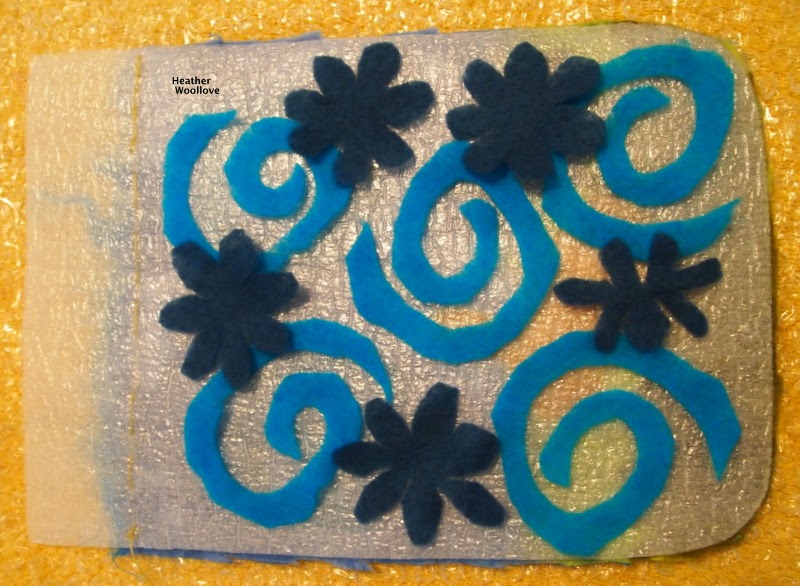
                           ...then flipping it over and creating a tableau (in reverse)...

                                               ...on the surface of my resist.


                  Covering the design with wool roving and layers of a sky-blue wool batt.


                                          After flipping the project to side two...

                                         ...I trimmed the 'overhanging' wool...


                                        ...and added more fun, pre-felt designs!


                      Covering side two with layers of a cotton-dot-studded wool batt...


                                      ...and wrapping the wool around to side one...


             ...then adding additional layers of merino roving to finish off both sides.


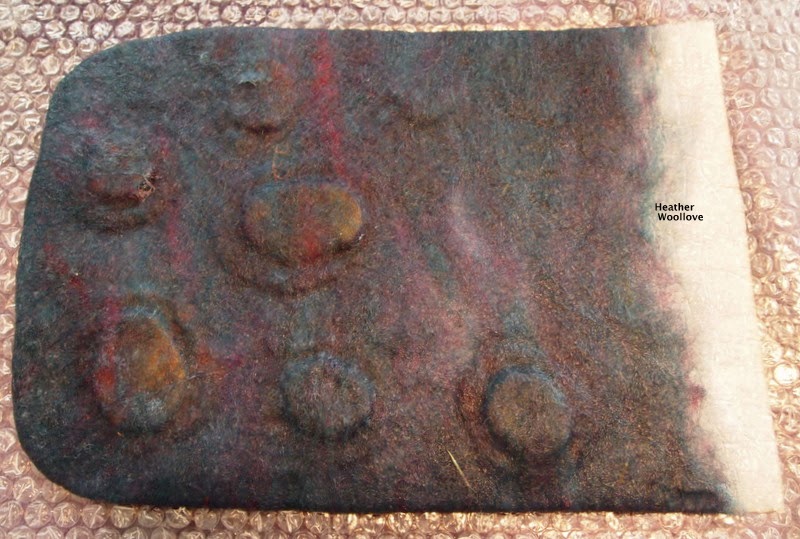
                                      After folding down the tote top on each side...

                                                        ...the felting is begun.


                                                   The finished tote (side one)...


                                                       ...with bunny detail.
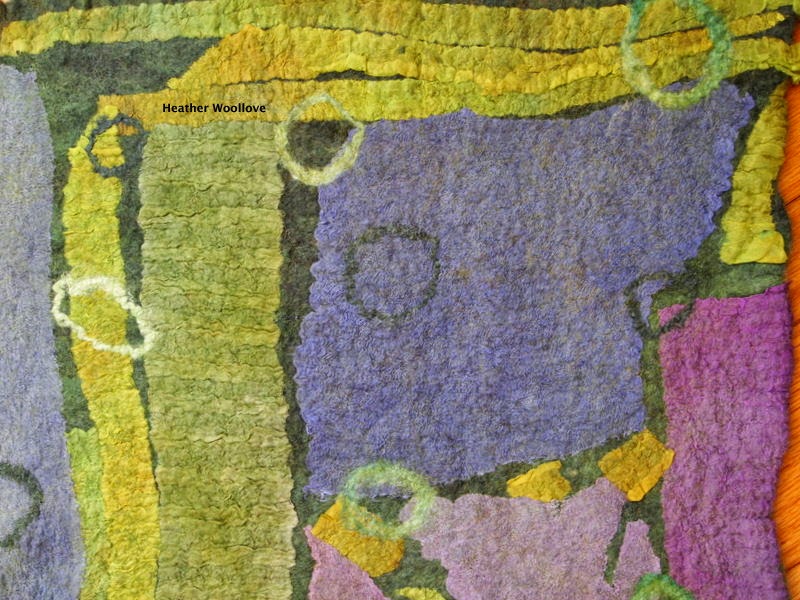


                                                        ...and side two...


                              ...with a close-up view of the multicolored cotton dots!


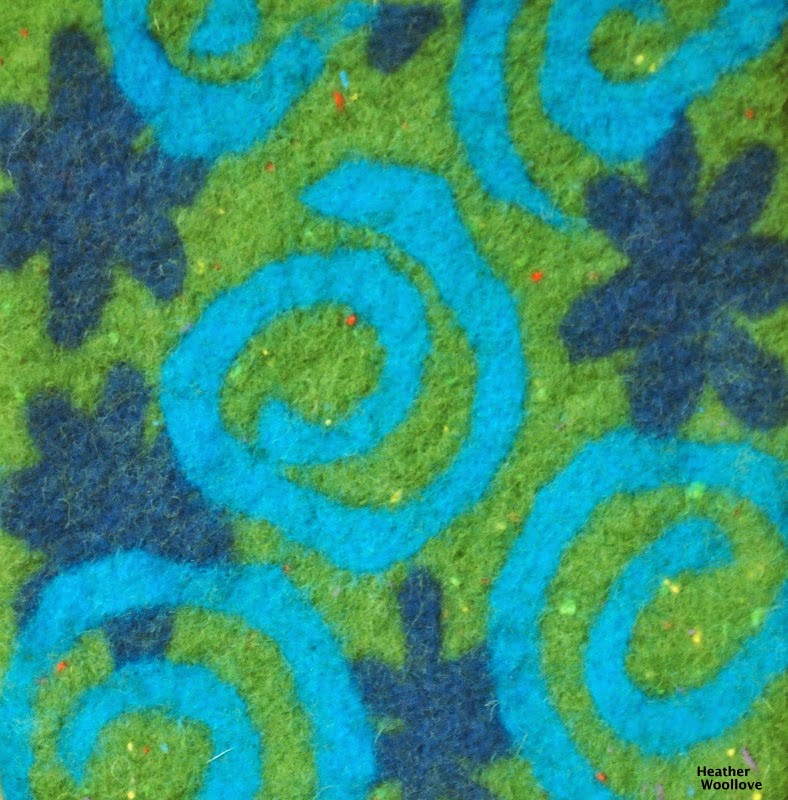
                                Because 'representational art' is not my strong suit...

          ...I took advantage of my friend, Deb's mad scissors skilz earlier this year...

                            ...and this set of happy, pre-felt shapes was the result!

                       It was so much fun to have them on hand while fashioning this tote...

           ...and in the future, I think that I'll request some from every visiting feltmaker! Grin.


Thursday, August 28, 2014

Dimensional Felt and Bobble-Yarn Sample Tote- Part 2 of 2

The finished tote...drying.


                                 The puffs on the bobble-yarn stayed perky and fluffy...

                                                        ...even after felting...


                                      ...and the stepped ovals retained their elevation.


                              A British friend of mine thinks that the orange bits...

                    ...bear a strong resemblance to a snack food called Wotsits...

                ...and I have to agree that they do look like "cheesy flavour corn puffs"! :)


                                    A close-up of the pre-felt and finished felt ovals.


                                                  Side one of the finished tote...


                                                          ...and side two.  


                                                    Next time: A bunny tote!

Tuesday, August 26, 2014

Dimensional Felt and Bobble-Yarn Sample Tote- Part 1 of 2

Stacking pre-felt and re-purposed, finished felt shapes...


                                 ...and covering them with variegated wool roving.


                                           After turning the project to side two...

                                    ...a length of 'bobble yarn' is coiled into shape.


                      Tufts of roving are tucked under the cords (next to the resist)...


                                ...rays of wool from side one are folded up and over..

                                      ...and side two is covered with roving as well.


                                                   Additional layers of roving... 


                                                   are added to each side...


                         ...and the top of the tote is folded down to make a tidy edge.


                                                   Mid-way through felting... 


                         ...the resist is removed and the project is turned right-side out.


                                              Slits are then cut into each side...


                                                    ...for the tote handles.


                                 This fantastic, orange bobble-yarn was a gift from a friend...

                                              ...(thanks, again, Sandy!)...

                          ...and I was anxious to see whether it could be felted...

                                 ...but still keep its caterpillar-like dimensionality!

                                               Next time: the finished tote.

Sunday, August 24, 2014

Lace and Cut Velvet Sample Tote- Part 2 of 2

Mid-way through felting...


                                      ...and after turning the project right-side out.


                                          The teal roving is already quite visible...

                                       ...through the sheer sections of silk velvet.


                                        Cutting a "U-shaped" handle on each side.


                                                   The finished tote (side one)...


                                         ...with close-up detail of the felted-in lace.


                                                         Side two of the tote...


                                          ...with its own interesting textural detail.


                                                     With this tote sample...

                                        ...I wanted to explore color and texture...

                               ...using two different kinds of partially sheer fabric...      

                                          ...and two different colors of wool.

                                     Next time: I use scraps of finished felt, pre-felt..

                                     ...and strange, 'bobbly' yarn to make a tote!


Friday, August 22, 2014

Lace and Cut Velvet Tote Sample- Part 1 of 2

Placing a pre-felt spiral on the surface of the resist...


                                   ...covering just the edges with black wool roving...


                                          ...and adding a layer of white lace.


                             Placing two layers of roving over the entire project surface...


                                                   ...flipping it to side two...

                  ...and trimming the fiber from side one, leaving a half-inch margin.


                                            Folding in the 'overhanging' wool...

                                 ...adding a layer of sheer black cut velvet fabric...


                                   ...and covering it all with two layers of teal roving.


                                     Carefully folding the top edges down (on both sides)...


                                            ...and beginning the felting process.                  


              If you live within driving distance of Anoka Fiber Works in Coon Rapids, MN...

         ...please consider joining me on September 18th for an "Inside-Out Mini-Tote Class"!

                                         (Class information is available here.) 

                                           Next time: the finished tote.

Wednesday, August 20, 2014

"40th Birthday" Table Runner- Part 2 of 2

The tussah silk circles...


                                           ...are beginning to 'melt' into the piece...


                                      ...and the entire project is starting to shrink.


                                                         A view of the back.


                                 I took special care with the edges of the silk pieces...


                                          ...rubbing a lot before I ever rolled...


                                            ...so that they felted in completely.


                              Because some of the pieces of silk fabric were gauzy...


                                    ...and some were a thick-and-thin seersucker...


                         ...different areas required different amounts of 'attention'. :)


                                                      The finished runner...


                                           ...in all of its 'green and purple glory'!


                                               The back of the finished project.


                        (Here's a comparison photo with another recent table runner.)


                                                        Happy Birthday, Melinda!