Sunday, July 31, 2016

"Pollockian Pre-Felt" Purse- Part 1

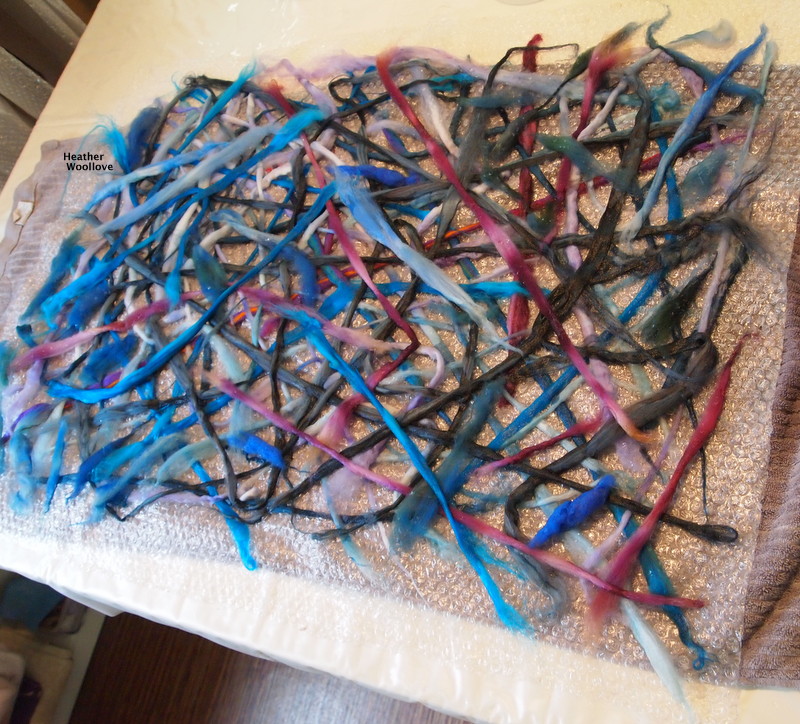
Laying out narrow...


                                           ...dampened strips of wool roving...


                                           ...onto a large piece of bubblewrap.


                                           Wetting out the project and felting it...

                                                   ...just to the pre-felt stage...
 

                                             ...and drying it on a yoga ball.


                                           To me, this colorfully chaotic pre-felt...


                       ...has a rather Pollockian poured and dripped appearance! :)


                                   Placing a foam resist onto the pre-felt surface...

                                                     ...as a cutting template.


                                         Next time: I apply a layer of silk gauze.

Friday, July 29, 2016

Yarn-Embellished "Green Pumpkin" Bag- Part 3

After the second handle is attached...


                                                     ...the felting continues.


                                                As the wool begins to shrink...


                          ...the handles become firmly attached to the body of the bag.


                                  A small hole is cut within the raised pre-felt oval...


                                                ...and the resist is removed.


                                                  Mid-way through felting...

                                               ...the project resembles a squid! :)


                                                     The finished bag, drying.


                              Because I didn't 'veil' the synthetic yarn with any wool...


                                           ...some of it popped off during felting...


                                          ...but I think that enough of it remains...


                                                         ...to provide interest.


                                          The woven handles are quite strong...


                                     ...and (happily) kept their shape during felting.


                                       The pre-felt bits on the base of the purse...

                                                ...provide a surprise jolt of color. 


                                                  The finished pumpkin bag...

                                                   ...in all of its green glory! ;)


Wednesday, July 27, 2016

Yarn-Embellished "Green Pumpkin" Bag- Part 2

After flipping the project to side two...


                                            ...the pieces of yarn from side one...


                                       ...are wrapped up and around to the center.


                                                     A pre-felt ring is added...


                                    ...and the 'rays' of wool roving from side one...

                           ...are also wrapped tightly around the edges of the resist.


                                            Additional layers of wool are added...


                                             ...over the entire resist surface.


                                          The project is flipped back to side one...


                                     ...and wool is added to cover this side, as well.


                                 The dry ends of a braided handle are splayed out...

                                        ...and applied to the (raised) pre-felt ring...


                                            ...then covered with a bit of roving...

                                                  ...to help hold them in place.


                                         Next time: the second handle is added...

                                                 ...and the purse is finished.

Monday, July 25, 2016

Yarn-Embellished "Green Pumpkin" Bag- Part 1

Fashioning a foam underlayment resist...

...in the shape of a rounded-off square...

...and assembling pieces of novelty and boucle yarn.


                                                  Braiding straps for the bag...


                                                      ...from lengths of yarn...


                               ...and long, narrow sections of colored wool roving.


                                 Covering the ends of each strap with plastic wrap...

                                                  ...(using tiny rubber bands)...

                                   ...to help keep them dry during their initial felting.


                          Placing snippets of colored pre-felt onto the resist center...


                                               ...and adding 'spokes' of yarn.


                                               A pre-felt oval is added next...


                                  ...and several layers of wool roving are applied...


                                             ...to the entire surface of the resist.


                                                        Next time: side two!

Saturday, July 23, 2016

'Charmed' Fairy Bag

This tiny project...

...was a 'secret challenge' by my friend, Tylar...


                                    ...while we were together in Boulder this spring.


                                                        Her only instruction?

                                         Cut a small shape from resist material...

                                     ...cover with wool and embellish as desired...
                   

                                      ...leaving a reinforced opening (or 'mouth').


                                                  Because of its diminutive size...


                                           ...it seemed to require tiny additions...


                                    ...like textured silver and colored glass beads...


                                       ...thin shell buttons, mirrors and Milagros.


                                        It's just the right size for magical coins...

                                                  ...(or tiny human treasures!) ;)