The function of the artist is to express reality as felt. Robert Motherwell
Monday, March 29, 2010
'Mod' Easter Egg Table Topper
I usually use an extra placemat in the center of my table...
...for bowls of food, teapots and salt and pepper shakers.
I decided to make a smallish table topper for this purpose only...
...not another decorative table runner...
...which I never seem to get the table cleared off enough to use! :(
I made some brown batts of wool...
...and added pre-felt circles in different sizes.
Of course, I had to add some fun things, too...
...like bamboo noils, sari silk fibers and dyed flax.
I felted it as usual...
...and squared it up as much as possible during the finishing.
It's more functional than art, I think...
...but, as you can see, it's pretty darned useful!
Labels:
bamboo noils,
Flat felt,
flax,
Pre- felt,
table topper
Friday, March 26, 2010
Purse With Integrated Handles
I've been pondering purse straps for some time now...
...trying to figure out a relatively painless way of making strong ones.
For this project, I decided to play with several things all at once...
...often, a recipe for disaster! :)
I used the book Mit Kindern filzen...
...for inspiration on how to shape the resist and where to cut the strap pieces.
(Thanks,Nicola, for the great book tip!)
I also wanted to continue to fiddle around with pre-felts...
...and also to try out some unusual non-wool inclusions.
I made a resist and used it as a pattern to cut out the front and back sides...
...piecing a top and bottom for each, using wool yarn and a tapestry needle.
I cut holes randomly in the pre-felt...
...and sandwiched a piece of synthetic fabric, netting or lace...
...between the hole and a second piece of pre-felt...
...stitching each little 'package' together with more wool yarn.
I added more layers of wool to each side...
...and felted it as usual, cutting strap lines, but leaving both flaps intact.
One flap was sewn down inside the finished bag to make a 'secret pocket'...
...and one became the outer bag flap.
I sewed the purse strap...
...by folding it in half and sewing it along the edge with my sewing machine.
I made a self-same button out of a scrap of pocket wool...
...and used a magnetic clasp for a strong closure.
I'm really happy with the way the cotton lace shrank and thickened.
Note: If you use vegetable bag netting, use caution with your steam iron...the plastic will melt!!
I also like the way the two synthetic pieces bunched up while felting...
...while still showing their bejeweled nature!!
The wool yarn became one with the felt pieces...
...something that I had anticipated, but which still pleased me inordinately!! :)
Wednesday, March 24, 2010
Soothing Stew and a Sneak Peak!
Today is sunny and lovely, again...
...but we've had a grey and rainy week here, overall...
...the kind of weather which requires this soup.
If it's not cold and grey where you are today...
...put this recipe away for when it is.
I guarantee that this will soothe tummies and souls!
Yummy Lentil Barley Stew
1/4 c butter or olive oil
1 & 1/2 cups chopped celery
1 & 1/2 cups chopped onion (I use mild, sweet onions)
3 cloves minced garlic or to taste(I use more!)
Saute the above ingredients in a large sauce pan or dutch oven until the celery, garlic and onions are tender and translucent.
Then add:
2 tsp salt
1 tsp freshly ground pepper (or to taste)
1-2 tsp ground rosemary leaves
1 & 1/2 c pearl barley
1 & 1/2 c dried lentils (the greenish brown ones)
6 finely grated carrots
28-ounce can of crushed tomatoes
6 cups of water
Heat soup until boiling, then reduce the temperature and simmer.
Cook until thickened, stirring occasionally (45 to 60 minutes).
The measurements are just a 'jumping off place', really...
...since you can add more of any ingredient (or more water)...
...in order to achieve the taste and consistency you crave.
It thickens upon standing...
...so don't be surprised if you need to add a little water on day two.
**********************************************************************
As regards my project..."What could it be?"
Materials: pre-felt pieces, wool yarn, netting from vegetable bags...
...synthetic fabric with jewels, vintage lace.
Next time..."What it is." Grin.
Monday, March 22, 2010
Flower Purse With Re-Purposed Strap
I've been exploring different kinds of handles for my purses lately...
...and for this one, I decided to re-purpose one of my old belts.
I felted the bag by first placing circles of pre-felt on my resist...
...then ringing them with 'wreaths' and adding 'stems' of wiggly yarn.
I added several more layers of wool and wet-felted the bag as usual...
...then removed the resist and positioned the bag into a flat-bottomed shape to dry.
I diced up a bunch of my old belts with a rotary cutter...
...removing the sections with belt holes and buckles...
...and leaving long, plain pieces of leather.
My sweet bf punched four holes into the ends of each new strap...
...spacing them so that the strap doesn't flop over on the finished purse.
Working on these belts was a walk down memory lane for me...
...since some of them date back to my Jr. High School years!! Yeesh! :)
I picked a strap for this project that seemed to be the right length and color...
...and sewed it onto the purse at each side.
I braided a length of the same wiggly yarn for a closure loop...
...and attached a button with upholstery thread for strength.
Thursday, March 18, 2010
Shallow Felt Box
I got the inspiration for this box...
...from a wonderful tutorial on Resurrection Fern's blog.
I made some tri-color batts...
...and felted them into a large piece of flat felt.
I drew a pattern on interfacing...
...tweaking it a little, thinking that I wanted it to be more strictly rectangular than hers...
...and a little shallower, in order to fit the template to my available piece of felt.
I'm pretty sure that these were mistakes...
...since I had to sew a dart into each side to help keep them from splaying out.
I found that I also had to lose the reversibility of the project...
...when I sewed the end pieces together (also for the sake of stability).
The stitching that I ran along the edges of the box bottom helped a lot, though...
...and I would definitely do that again...
...I also like the zig zag stitch that I used to edge the box top and flaps.
If I repeat this project...
...I may forego the flap altogether and just make a large, square felt carton...
...perhaps with cut-outs for hand holes?
Tuesday, March 16, 2010
Reversible Table Runner
I have a dear friend who is getting married...
...and it's a perfect love match.
Of equal importance, perhaps, this union also has the seal of parental approval...
...a real testimony to the love and respect they each feel for their families.
I wanted to make an engagement gift as bright as the promise of their happy future...
...so I chose perky blues, purples and greens for this project.
I made batts in each of these colors...
...and on one side, added pencil roving in aqua, lavender and garnet.
I added snippets of sari fabric (a nod to their shared heritage)...
...and dyed curly locks.
It's pretty busy on one side...
...so I left the other side as is...
...just stripes of varying shades and hues.
This way, it can liven up a simple vase or tableau...
...or serve as backdrop for a more complex table arrangement.
(She hasn't seen this yet, so 'mum's the word', mutual friends!)
Labels:
curly locks,
Pencil Roving,
reversible,
sari silk,
table runner
Sunday, March 14, 2010
Fulled Sweater Projects
My friend, N and I took a trip to the thrift store one day...
...and bought several large men's wool sweaters.
I popped them into the washing machine on hot for a long wash cycle...
...and dried them in the dryer.
They came out like little, shrunken miniatures of their former selves...
...in other words, fulled.
We did lots of projects with the resulting 'felt'...
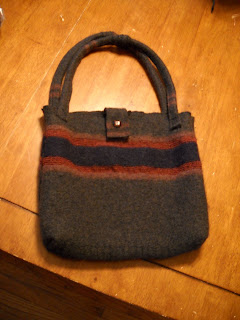
...making purses by cutting off sleeves and box-hemming the bottoms...
...even adding little wool roses, made from strips of the sweater, sewn together.
I started (but didn't finish) a pillbox hat...
...and we just generally reveled in the wonderful, cuttable properties of fulled wool...
...so much less fiddly than real fabric, which needs hemming!!
*********************************************************************************
All week long, as we did projects that were new to me...
...acid-dyeing, working with fulled wool sweaters...
...and even decorating garments with bleach pens (easy!)...
...I was musing about the nature of the fiber arts in general.
What I realized, even more strongly than ever before...
...is that there really is something for everyone in the fiber arts!
I, for instance, don't really enjoy needle-felting...
...and I can't see myself doing more acid-dyeing (too scary!) or sweater-fulling.
Discovering that I really prefer wet-felting to any other fiber art (so far)...
...doesn't feel limiting to me, though, just liberating...
...and who knows when the techniques I've learned doing these other projects...
...will come in handy?
Friday, March 12, 2010
I've Dyed and Gone to Heaven
Well, today's my birthday...
...and what a fun week it's been with my friend Nancy, so far!
She has lots of ideas and expertise...
...plus the energy of a jackrabbit!
We made a thrilling trip to my local, strange and amazing fabric store, Jomar's...
It's like nothing else!
There are dollar shirts and pants and 'remaindered' items of all varieties...
...I snatched up a cheap pool noodle and two rattan beach mats for use in my felting.
And there's fabric...lots and lots of fabric...
...stacked on large, open, rustic wooden shelving...
...some of it for as little as $1.00 per yard!
I bought some soft chartreuse lace, red burlap, and netting for my felting...
...and we found some lovely pale grey and cream, soft-draping silk to dye.
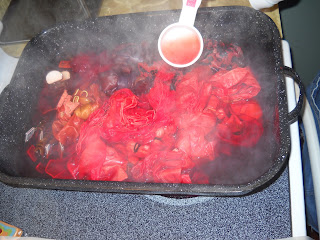
Nancy showed me how to prepare the acid-dye solution...
...and we made our dye bath.
We were very careful, wearing a mask and eye protection...
...but I'm still a little afraid of the dye (and even the Synthrapol has a scary warning label on the bottle!)
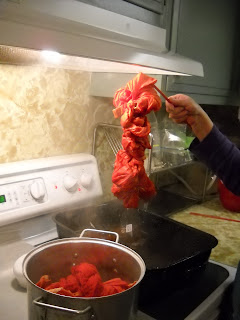
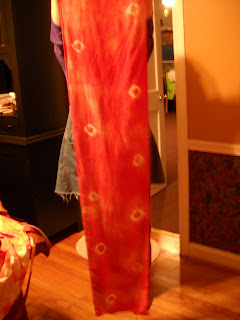
We've dyed things orange, green, yellow and indigo so far...
...tying and clamping and overdyeing pieces as we went.
It's a lot like felting you know...
...since you don't really know what it'll look like 'till your done!
More photos of our work next time...
Tuesday, March 9, 2010
I'm So Excited!
My John C Campbell Folk School friend, N is coming for a visit.
She's winging her way here from North Carolina this afternoon...
...and boy, do we have plans!!
It's going to be a dye-a-thon around here...
...so I've started acquiring some supplies.
I scoured my area thrift stores for dye pots...
...since you shouldn't use food ones for dyeing.
I ordered some long rubber gloves...
...and some silk gauze, which I've ripped into strips in preparation.
(Raw edges are easier to attach to wool pieces with wisps of wool.)
I bought some Synthrapol fabric detergent...
...and some special German hand cleaner for the inevitable dyed body parts! :)
N is bringing the dye and her knowledge and expertise...
...as well as her joyful spirit, massive artistic talent (she can draw!!)...
...and her life of the party attitude.
I can't wait!!!
Gotta run-there's vacuuming to be done...
...and wine to be bought!!
Sunday, March 7, 2010
Good Things Come To Three
With only three comments on my give away post...
...I thought it would be fun to 'gift' each of my flat felt fans!
Of course, you already know about the original table topper...
...which will go to my #1 pick (on random.org) (Gina)
For #2 (Suzanne), I have a landscape that I intended to use as a pillow top...
...except that I was ashamed of my pitiful drawing skilz and put it away...
...(and before you ask, that's supposed to be a rock in the lower corner!):)
And last, but not least, for #3 (Peggy) I have...
...the first piece that I ever made with pre-felts...
...which could be folded in half and a zipper sewn in for use as a small bag...
...or used as a book cover...or as something else entirely!
I'll be anxious to see/hear how each is transformed by my crafty winners!
(Don't forget to send me your mailing addresses, ladies.)
Friday, March 5, 2010
Purse-picacious
I am definitely digging these new bags!
Of course, it didn't take long for H-1 (one of my twins)...
...to 'put her dibs in' for the next one!
I used two colors of variegated roving for the body of this purse...
...an orangey-red and a yellowy-pale blue (if you can believe it!)...
...and some variegated pencil roving and dyed flax (thanks, Kim)...
...for the sunny design.
I wanted to find new options for the straps...
...and in this way, keep the bag a little deeper and roomier.
(In the previous bag, the straps were cut from the top of the purse.)
My daughter chose some plain, eggshell-colored bamboo fabric for the straps...
...and I made slits in the felt for the horizontal one...
...covering the machine sewing of the shoulder strap to the purse.
My daughter added one of my handmade buttons to the front for a little detail...
...and now she's happily using it!
Labels:
craft foam resist,
flax,
Pencil Roving,
purse
Subscribe to:
Posts (Atom)


