Sunday, September 16, 2012

Engagement Party Purse- Part 2 of 2

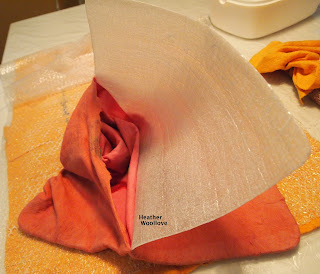
Mid-way through felting...

 
...and after trimming the purse flap into a nice, rounded shape.


A view of the 'dreads' side of the purse... 
 
...and one of the unadorned side...

...with dreads that will later fold over to become part of the flap.

 
The finished purse front with my flower-embellished aqua shoes...

 
...and the back side of the purse...

...notice how the handle is pulled through a small hole on each side and knotted.

Check out my matching pedicure! Giggle.


For those of you who asked, here's a photo of me all dressed for the party...

...accompanied by my three youngest daughters.

(Aren't we just a riot of color?!?) :)

 
As you can see, I oriented the 'dreads' so that the ones on the flap...

...cover the plain part of the purse front without adding extra bulk.

I used a large sew-on snap for the bag closure...

...and made a thin cord from merino roving for the handle.

Since it's a 'special occasion purse'...

...it's just big enough for keys, a cell phone and tissues. :)

Posted by Picasa

Friday, September 14, 2012

Engagement Party Purse- Part 1 of 2

Creating a new resist...

 
...and assembling all of my desired wool colors.

 
Working right-side out (for a change), I start with a layer of white roving...

...for a clean-looking purse interior.

 
Making multicolored 'dreads'.

 
You may notice that I'm using an 'open resist' technique this time.

 
Adding the first layer of 'dreads'...

 
...and then the second...


...and, finally, the last layer on side one.
 
I needed a small 'special occasion' purse for my eldest daughter's engagement party...

...but since she hadn't yet 'weighed in' on the two dresses that I purchased for the occasion...

...I needed a bag that would coordinate, both, with a greenish-wheat-colored dress...

...and a pale grey-blue one.

Employing an 'open resist' technique, I laid out a white purse lining...

...and then a deep turquoise base for the bag.

Using grey-blue, greenish-wheat, periwinkle blue and aqua roving...

...I assembled a mass of 'dreads'.

I placed thin painter's plastic between the layers...

...and began to assemble side one.

Next time: the finished purse...

...plus a photograph of my matching blue toenails!! Giggle.

Posted by Picasa

Wednesday, September 12, 2012

Finished WIP- Zippered Clutch For Autumn

A felt clutch...

 
...with re-purposed leather strap...

 
...made from a piece of flat felt...

 
...with a sewn-in zipper...

 
...and leather 'pull tab'.

 
(Here, the tab in close-up.)


 Disclaimer:

This bag was fashioned entirely by my daughter, L.

It was her concept and sewing work...

...with only a few minor 'zipper tips' from me. :)

Seeing the piece of flat felt that I made in Portugal lying 'abandoned' in my studio...

...she started to 'get ideas'!! :)

And being her mother's daughter, after all...

...the first thing she thought of was a purse!! Grin.

She sewed up the sides of the felt, stitched in a zipper...

...and added a leather 'pull tab' and loop for attaching the strap.

The thin leather strap was a never-used wallet attachment...

...found during one of L's 'organizing jags', here in the studio...

...and used to great (color) advantage in this project. :)

Now that she's completed her Master's degree and is back home, job-hunting...

...I'm treasuring every moment that we spend together on fun projects like this...

...knowing that, very soon, she'll be living far away again! :(

Posted by Picasa

Monday, September 10, 2012

'Peace Felt' Project 2012- Part 2 of 2

Drying the cover over a hardback book lined with plastic bags.

 
The finished journal cover (closed)...


...and open...
 
...and with a glimpse of matching bookmark.


A close-up of the journal interior.


The Peace Felt journal with its 'sister' for comparison. 


Journal interiors with leather bookmarks and wooden 'made by' tags.
 
The back side of the journals.

 
Since my Peace Felt gift is already safely en route to its recipient...

...I can finally share these finished photos with you.

A couple of months ago and continuing my rather 'journal-centric' summer...

...I hit upon the idea of making a 'peace journal' as my gift this year.

Whether its new owner uses it to compose poetry or jot down grocery lists...

...I hope that it will bring to mind thoughts of peace, love and gratitude...

...each and every time that she uses it. XO-

Posted by Picasa

Saturday, September 8, 2012

'Peace Felt' Project 2012- Part 1 of 2

Orienting my Peace Felt design underneath the resist...

 
...and outlining it in burgundy pencil roving.

 
Adding an olive branch in green...

 
...and a dot of black for the eye!

 
After the application of one layer of pink roving...

...a flip to 'side two' reveals the design through the plastic.

 
Back on side one, here's a peek through the first layer of roving to the design beneath.

 
After completing the layout...

...a colored dot is my signal to 'cut on this side'.

 
Removing the foam resist.

 
For this year's Peace Felt Project...

...I made a journal cover decorated with iconic symbols of peace.

Working 'inside-out', as usual...

...I outlined the dove and peace sign in pencil roving.

Because the design had to be laid out 'upside-down'...

...and left-to-right reversed...

...it was a little tricky to do and required my full concentration. :)

Next time: the finished journal...

...with hand-dyed leather bookmark.

Posted by Picasa

Thursday, September 6, 2012

More Slipper Fun-This Time With Raw Wool Accents

Putting raw locks onto the resist...

 
...then covering them with orange wool...

...and a layer of red burlap on each sole.


A white wool dot keeps me from cutting into the wrong side when removing the resist.
 
The mostly felted mule, turned right-side out.

 
My daughter, L, in her new slippers...

 
...which are slightly wild-looking...

 
...but fit perfectly. :)

 
Thanks for the great idea, Nicola!


My friend Nicola made the pair that inspired these while we were in Portugal...

...using white Icelandic fleece and brown wool roving.


After making a foam resist by tracing around my daughter, L's feet...

...and adding approximately 1/2 inch extra all around the heel area...

...and 1 inch extra all around the front of the foot where the mule 'upper' would be...

...I set to work.

Using a wool batt with multicolored cotton dots...

...and sandwiching in a layer of red burlap on the bottom of each mule...

...I hoped to avoid the slipperiness of my earlier attempts.

I postulated that a lightly-covered piece of rough burlap...

...might provide a safer sole...

...but, alas, I covered it with too much wool...

...and negated its potential effectiveness.

(When I try it again, I'll let you know how and whether it works...

...unless one of you wants to try it in the meantime and let me know?!?) :)

Because the locks hadn't been cleaned prior to use...

...they stayed 'boingy' and separate throughout the felting process...

...and my daughter thinks that her new slippers are quite fun to wear!!

Posted by Picasa