Showing posts with label lampshade. Show all posts

Sunday, March 29, 2015

Lampshade 'Facelift' - Part 2 of 2

The project, mid-way through felting.


         The cotton scrim additions are visible as lighter spots along the shade bottom.


                                Stretching and clamping the felt to the metal rings...

                                                              ...for drying.


                                          The shade is hand-stitched into place...

                                                 ...using strong, nylon thread.


                                                The finished shade in situ.
                                                     

                                                 With the light lit at night...


                                   ...the texture of the wool fibers is made visible...


                                          ...and when it's used during the day...

                                           ...it yields a warm, golden glow.


Friday, March 27, 2015

Lampshade 'Facelift' - Part 1 of 2

A floor lamp with an aging lampshade...

 ...seemed ripe for a makeover, recently.


                                    Carefully removing the dangling, amber beads...

                     ...because 'who knows?''...they might come in handy one day! :)


                                         Employing both scissors and a hemostat...

          ...to cut and pull the paper and tape from the shade's metal components...


                                     ...(a much trickier job than you might imagine!)


                                                    Drafting a resist pattern...

                                     ...and cutting it from foam floor underlayment.


                                      Adding pieces of open-weave, cotton scrim...

                                                   ...to the resist surface...


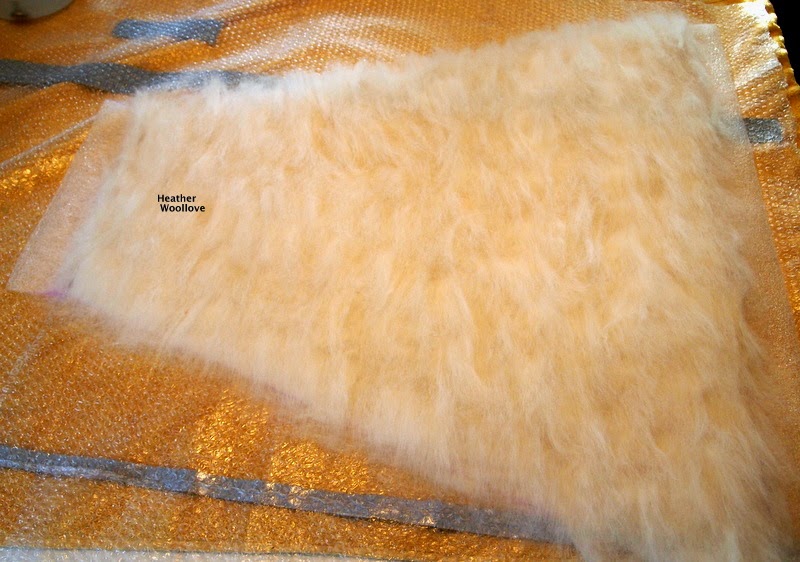
                      ...and covering them with a layer of wool roving in one direction...


                                ...and then a second layer, perpendicular to the first.


                                                   Wetting the project out...

                                       ...and folding in the top and bottom edges.


                                             Next time: the felting begins.

Friday, October 31, 2014

Fiona's Highly "Illuminating" Workshop- Part 3 of 3

This nighttime illumination photo...

...with its 'jack o' lantern'-like appearance...

...seems like an apt one for a Halloween post, doesn't it?!? :)


 Here are its spooky 'innards'...

...a metal ring with three braces leading to a center hole...

...plus an cord set like this one.


Conceptually, I imagined an oblong, exterior shape...


...with circular piercings...


...filled with a second, spherical shape...

...fashioned with circular inclusions that would show up as dark spots...

...when the lamp was illuminated.


                               I wanted to be able to look through the cut-out circles...


                              ...to see circular 'dots' on the inner (circular) felt sphere...


                                   ...and also all the way through the lampshade...


                                       ...via circular holes on the opposite side.

                      (This detail shows the inner sphere with its darkened circle...

                           ...and beyond it, several holes in the opposite side.)


                                                     The finished lamp at night.
                                             

Wednesday, October 29, 2014

Fiona's Highly "Illuminating" Workshop- Part 2 of 3

Removing the resist...

...mid-way through felting.


                                            Here's a 'visual' of the shrinkage! :)


                                           This photo of Fiona and I is for Dawn...

                                 ...who tries to turn all of my felt projects into hats! :)


                                                    The finished lampshade.


                               The small slit that I cut in order to remove the resist...

                                            ...plus a couple of enlarged holes...


                                         ...were the only entry points available...

                                            ...for stuffing it, in order to block it.

                                In all, I used two inflatable Gertie balls, a pool noodle...

                                 ...and a number of cloth placemats and napkins.

                          (Here it is, stuffed and drying...suspended by a hanger.)


                                  While removing the stuffing materials (once dry)...

               ...the felt stretched a little, forming a couple of slightly misshapen holes.

                              Luckily, this side faces the wall...so they're not visible. 
             

                              (Doesn't it resemble the asteroid in Le Petit Prince?!?)
                                             

                                                  To complete the shade...

               ...the smaller, spherical part is 'tucked into' the larger, pierced part...


                                ...and the midline is hand-stitched to the metal frame.


                                                Now, installed and illuminated...


                     ...my lamp provides a welcome glow in a dark corner of the studio! 


                                  Next time: photos of the illuminated lamp at night!

Monday, October 27, 2014

Fiona's Highly "Illuminating" Workshop- Part 1 of ?

Laying out wool...


                         ...and adding felt circles (cut from my original project samples)...

                                      ...to only the smaller segment of the resist...


                                   ...then covering them with additional wool roving.
  

                                    In the larger segment, mid-way through felting...

                                                  ...I cut small slits in the felt...


                                   ...and gently teased them open with my fingers...


                                                   ...to create small holes.


                                         Adding to- and enlarging the openings...


                                      ...and rubbing their cut edges to 'heal' them.


                                                         Earlier this month...

                         ...I spent several days in Ottawa on a 'Fiber Retreat' with Fiona Duthie.

                It was a delightful, educational and truly memorable experience! :)

                         We spent 1 and 1/2 days on the topic of 'felt illumination'...

                       ...and each of us designed our own unique lampshade...

                                          ...for functional use at home.

                                Next time: the felt begins to take shape!

Saturday, June 7, 2014

Wet-Felted 'Flower' Lampshade


                                    Laying out white wool in the shape of a petal...


                                          ...and edging it with narrow yellow roving.


                                           Wetting out the piece, flipping it over...

                                  ...and folding in the stray fibers for a neat edge.


                                                     Mid-way through felting.


                                                         A finished petal.


                                                       Stitching in a seam...


                                                    ...to create a central 'vein'.


                                                       The finished petals...

                                            ...arrayed around the lampshade...


                                ...and clamped to its edge (to gauge placement).


                                                      Using a hot glue gun...

                                   ...my daughter affixed each petal to the shade...


                                        ...allowing the glue to cool and harden...

                                            ...before attaching the cord and bulb.


                                             A view of the illuminated lampshade.


                                                    The finished light fixture...

                                                ...in all of its summery glory! :)