Monday, December 12, 2011

Tencel and Merino Birthday Purse- Part 1 of 2


Superfine merino and tencel roving.


Laying out the roving (from the 'outside-in')


Adding layers of spongy Hog Island wool for the purse lining.


Making an inner pocket.


Cutting a line for the flap.


Turning the purse 'right-side' out.


Cutting grey leather for a purse strap.


A friend of mine just had a 'big' birthday...

...and I wanted to send her something special.

 I decided to 'break out' a braid of my special stash roving...

...a shimmery blend of superfine merino and tencel in greys, deep pinks and plums.

I wanted a long handle for this one...

...since she lives in New York City, and will certainly wear this bag cross-body.

I also had a piece of grey leather that was perfect with this roving....

...and thought it might make an especially sturdy strap.

I used a simple, rounded-off rectangle for the resist...

...and covered it with layers of merino/tencel roving...

...followed by a couple of layers of Hog Island fleece.

I often make the lining of a purse a little lighter...

...so you can see its contents a little more clearly! :)

Next time: the finished bag...

...with a Moroccan button!

Posted by Picasa

Saturday, December 10, 2011

"Stash Busting" Flat Felt Projects- Part 4 of 4


Laying out art batts plus my own hand-spun yarn.


The back (unadorned) side of the felt.


After fashioning the finished felt into a large caddy.


I love this little curlicue!


It's a wildly-colored, rustic carry-all...


...that would also be great for storing books or magazines...


...or even a set or two of bed linens on a closet shelf!


Close-up detail of some of the hand-spun yarn accents.


This project originated in my head with a question...

...'what could I make with a large, flat sheet of felt...

...if I made as few cuts as possible'?

So I made two parallel cuts into each long side of the rectangle...

...and folded one set of sides up and one set up and around.

I then machine-stitched the sides together...

...adding darts where needed, to help keep the sides from sagging.

Lastly, I fashioned a pieced handle...

...from scraps of felt that I had left over from Parts 1 through 3.

It's quite a large basket...

...measuring nearly 2 ft long by 1 ft wide.

I think it would be nice for storing things on a high closet shelf...

...so it would be soft if it landed on your head as you took it down...

...unlike my usual plastic crates!! Giggle.

Posted by Picasa

Thursday, December 8, 2011

"Stash-Busting" Flat Felt Projects- Part 3 of 4


Adding pencil roving and dyed tussah silk to layers of art batts.


Cutting pieces from the finished felt...

...this time, I let the added elements inform the design.


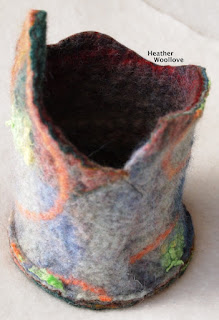
The finished container.


I love how the layers of color (from the blended batts) show up in the cut edges.


The felt is thick enough that the organic shape of the top 'stays put', without wilting.


The tussah silk gives it a crinkly and shimmery look.


All of the colors of the rainbow...


...for nearly any 'giftee'.


For this set of containers, I used the designs on the felt itself...

...to suggest a shape for the container tops.

These are a bit larger and taller than the earlier ones as well...

...and would be useful on a desk for a mass of pencils or pens.

Next time: a much larger project made with hand spun yarn-studded felt!

Posted by Picasa

Tuesday, December 6, 2011

"Stash-Busting" Flat Felt Projects- Part 2 of 4


Trimming more of the felt into shape.


After stitching...


...and folding down the top cuff.


Containers for holding anything you like.


Stitching a felt 'window' onto the back side of one piece of flat felt...


...and folding it over into a decorative cuff.


The random colors and texture (from the silk additions)...


...make for containers that (I hope) will be useful for many different 'giftees'.


I don't know about you...

...but I can never have enough little containers for holding things!

I love to sequester my 'stuff' in an orderly manner...

...and I think these may be useful for others, as well.

During felting, the lengths of silk yarn often twisted or extruded a bit...

...providing a fun bit of texture for the container's exterior.

Next time: another riff on this idea.

Posted by Picasa

Sunday, December 4, 2011

'Stash-Busting' Flat Felt Projects- Part 1 of 4


Towers of art batts made with wool roving...


...and various other 'interesting' fibers from my stash.


Layering sections of batts...


...and adding silk yarn and blobs of dyed tussah silk.


...fulling the felted piece.


Cutting pieces from the finished felt...but for what?!? :)


Much like a teenage girl who is 'so over' some of the garments in her wardrobe...

...and wants to cast them off in favor of the newer and more fabulous...

...I was feeling this way recently about some of my stashed fiber.

Being of a 'waste-not, want-not' mindset, however...

...I tried to think of a new and fun way to use up this 'less-favored' fiber...

...so that I can play with my newest acquisitions with a clear conscience!! :)

So, I spent a couple of days with my drum carder...

...churning out batts made from many of the orphaned fibers in my stash.

I even used some fibers that I know to be difficult to felt...

...blending them with other 'known felters'. :)

I only stopped when the piles of batts were threatening to avalanche...

...and began laying out sections for my latest flat felt projects.

I added stripes of silk yarn in two different colors...

...and blobs of dyed tussah silk for shine.

I think you will recognize the blue 'translucent window' felt that I used in my cube project recently...

...but can you guess what I've made with the pieces in this last photo?

Next time: all of your questions will be answered...

...well, maybe not the existential ones. Giggle.

Posted by Picasa

Friday, December 2, 2011

Brightly Colored Nuno Felt Pillow


Silk fabric envelope enclosing a square plastic resist.


Laying out the variegated roving.


More layers.


The finished felt (before ironing)...


...and in close up.


The fully stuffed and stitched pillow...


...with a nice, nubby texture.


I'd been wanting to try a kind of nuno felt project...

...where you sew silk into an envelope around a resist...

...and felt the piece 'inside-out'.

I used a very densely-woven, re-purposed piece of silk...

...(something I wouldn't ordinarily risk)...

...and some of the 'difficult to felt' roving that I recently purchased from Wollknoll.

I figured that if they each 'took their time' in felting...

...they might be the perfect match in a nuno piece!! :)

Although the variegated roving ultimately felted quite well...

...the finished 'silk side' was not much to look at...

...and I decided to use the wool side for the pillow's exterior.

When it was fully felted and dried...

...I stuffed the pillow with a mass of wonky wool roving that I had on hand...

...and hand-stitched the open end closed.

Phew...another Christmas gift completed! :)

Posted by Picasa