Showing posts with label integrated handles. Show all posts

Monday, January 28, 2013

'Reptilian' Purse With Pre-Felt Flap- Part 2 of 2

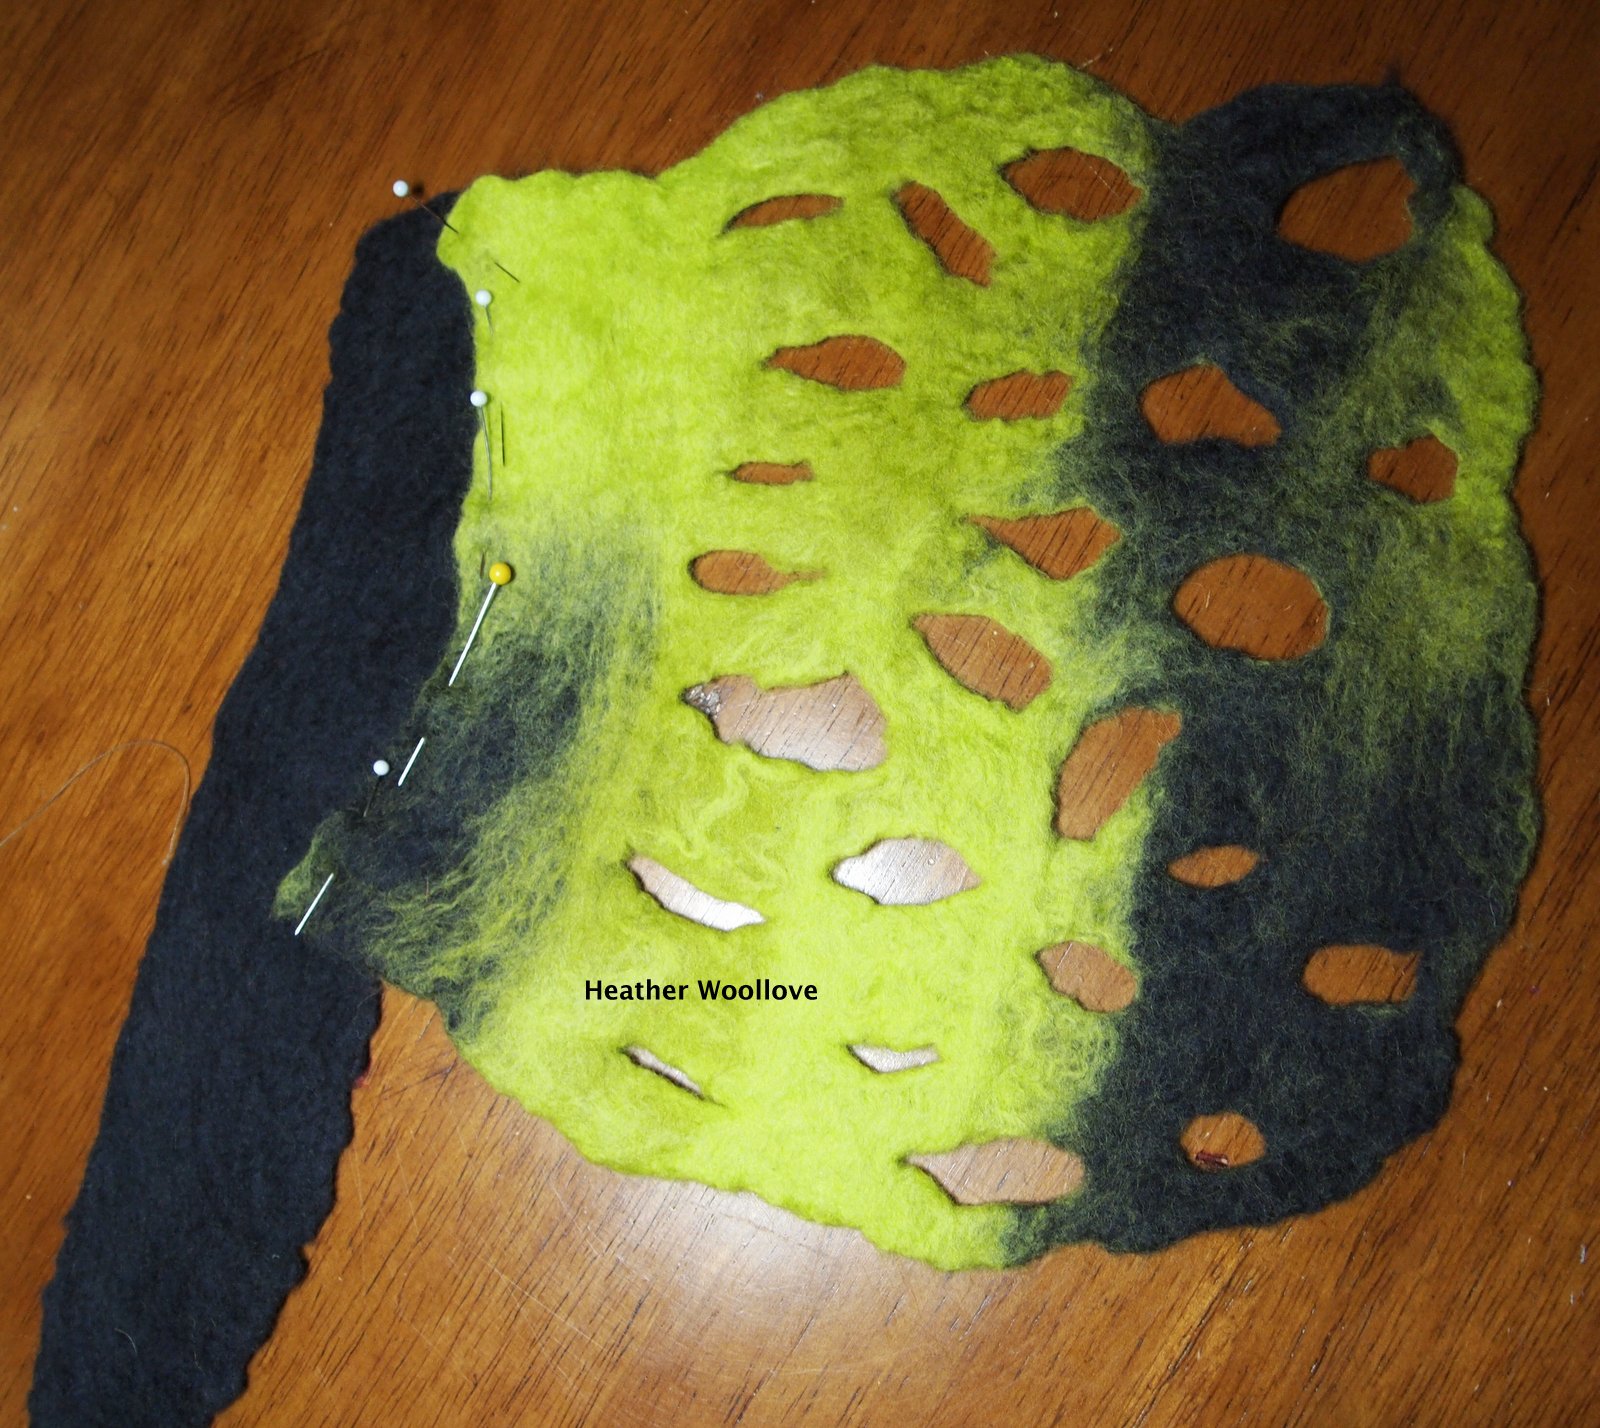
Cutting slits into the pre-felt flap...

...prior to final felting.

 
Adding a bit of black felt (to extend the length of the flap)...

 
...and stitching it to the purse.

 
 The back (embellished) side of the purse...
 
...and, again, in close-up.

 
The opened purse...

 
...with inner pocket.

 
The finished purse.


Using the same pre-felt technique that I employed in some recent scarves...

...I snipped irregular slits into the pre-felt flap...

...and opened them up to make holes in the finished felt.

In order to position the flap properly on the bag, once sewn...

...I needed to add a little length to it...

...so I stitched it to an extra piece of black felt, prior to attaching it to the bag.

(The extra bit is located inside the bag and doesn't show..)

The back of the purse makes me think of a painted turtle...

...and the front flap reminds me of a crocodile! :)

 Posted by Picasa

Saturday, January 26, 2013

'Reptilian' Purse With Pre-Felt Flap- Part 1 of 2

Laying out two colors of wool for a pre-felt...

 
...and making cords for the purse handles.

 
Coiling variegated pencil roving onto the resist for embellishment...

...and cutting an oval pre-felt 'frame' for what will become the mouth of the bag.

 
Adding a layer of color behind the pencil roving...

...(working inside-out, of course)...

 
...and covering the whole shebang with layers of black wool roving.

 
Mid-felting, after attaching the cord handles.

 
Turning the bag right-side out.


If you look closely, you can see a faint line...

...where a plastic resist is still embedded in the felt.

(It will be removed to form a pocket inside the bag.)
 
Because I make a lot of purses and bags...

...I spend a considerable amount of time thinking about closures...

...and, while a tote is best left open at the top...

...purses need a little extra security.

This purse is a riff on an earlier project...

...minus the footer, and with the mouth relocated to the top of the bag.

Next time: the 'reptilian' flap is attached.

Posted by Picasa

Thursday, January 6, 2011

A Tale of Two Purses: The Details

Cutting out the handle, prior to removing the resist.


Pinning on the pocket lining, prior to stitching.
(I reversed this after I took the photo, so that the 'good side' was toward
the cut opening in the flap.)


Machine stitching the buttonhole.


One of the finished purses.


I made two more spiral purses, recently...

...using my peanut-shaped resist.

But since they are so similar to the first one that I posted...

...I decided to show you a bit more of the detail work today.

When removing the resist (and cutting out the handles)...

...it seems to work best if I cut out the front section, first.

I then line up the front and back, carefully...

...and use the first side as a template for cutting the second.

I didn't trim the pockets on these two bags...

...but, instead, lined them as larger ovals, allowing for more 'stuff'.

I machine stitched a buttonhole in each...

...but a decorative hand-embroidery stitch would work just as well.

I used different buttons on each of these bags...

...from my stash of vintage and thrifted buttons.

This one came from a pea coat from my teen years!

(Yes...that long ago!) Giggle.


Posted by Picasa

Friday, December 31, 2010

'Peanut-Shaped Resist' Purse- Part 2

Trimmed interior pocket with fabric lining.


Close up showing silk gauze shimmer.


The purse back with chevron wool layout.


The finished purse.


One of the fun things about making bags with integrated handles...

...is that cutting out the handle creates two flaps.

For this bag, I used one as an exterior flap...

...and created an internal pocket from the other.

Making sure that I knew which flap I wanted for each 'job'...

...I trimmed the front one into an even, rounded shape.

I found a button that I liked for the closure...

...and stitched a button hole, just the right size.

I cut the second flap into a cell-phone-sized pocket...

...cut a wide slit near the top of the flap, and lined it with fabric.

What's nice about this method of finishing off a pocket...

...is that it doesn't need to be hand-stitched to the bag's interior at all...

...yet it will still hold your items securely.

Because I stretched the handle as I felted this piece...

...it is longer and thinner than it was when I cut it (a proper shoulder strap).

To finish the bag, I folded the handle in half and sewed it together...

...then top-stitched around the front flap as well.

Posted by Picasa

Wednesday, December 29, 2010

'Peanut-Shaped Resist' Purse- Part 1

Laying out wool roving and silk gauze bits.


Adding a new color in layer two.


Cutting out the handles.


Stuffed and hanging to dry.


After my recent triangular purse, I had in mind a curvier design...

...this time, making a resist in the shape of a peanut.

With each of these bags, I wanted to branch out from an egg-shaped, integrated handle pattern...

...and create a resist that had a clearer demarcation between body and strap.

I cut a resist from foam floor underlayment...

...and covered it in layers of wool roving.

To the bottom half, I added leftover snippets of silk gauze...

...and decided to make the handle and flaps a coordinating color.

When the resist was starting to curl up inside my piece...

...I carefully cut out the handle and bag flaps with sharp scissors.

During felting, I turned the bag inside out periodically and used a felting stone...

...in order to help keep a crease from forming in the bag bottom.

When the bag was completely felted and rinsed...

...I stuffed it with cloth dishtowels and steamed it with an iron.

Drying it with the towels inside for a few hours...

...helped it to maintain its shapeliness.

Next time, the finished bag.


Posted by Picasa

Thursday, December 16, 2010

Purple and Blue Beaded Bag

Purse back, prior to embellishment and sewing.


Close-up of beading.


Internal pockets...made from the top flaps.


Front with flower and button closure.


I have a friend who has highly unique sense of style...

...who most always has on something interesting in clothing, jewelry, or footwear.

So, I have to say that it was really fun...

...designing and making a purse for her this Christmas!

I drew a resist pattern with a wide, triangular bottom...

...and chose purple for the bag body, and blue for the handle.

This purse has integrated handles...

...like a purse that I made in the Spring.

I made flower designs on the felt using sari silk and wool tops...

...and later, beaded the flower centers and embroidered around the closure.

I was delighted to be able to incorporate gifts from my friend, Sally Anne in this bag...

...a bright pink wool dread (which I anchored into the purse during felting), and a punch-cut wool flower.

The wool dread loops over the button...

...and secures the bag's contents.

Posted by Picasa