Covering a large bubble wrap resist with wool roving...
...in concentric circles...

...in concentric circles...

...light grey over dark.

Wetting out the project...

Wetting out the project...

...then adding a layer of plant-dyed silk gauze to the top surface.


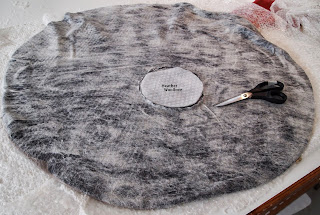
Cutting a 'head hole' mid-felting.
(You can see just how oversized this resist really is!)
(You can see just how oversized this resist really is!)

Felting and fulling the hat.


The finished beret with darker grey interior...

...and highly rugated outer surface.

...and highly rugated outer surface.

Working from a concept taught by Judit Pocs...
...that several of my classmates had tried at Feltfull...
...I recently attempted to make a large, soft beret...
...using more of that plant-dyed silk gauze that I wasn't exactly thrilled with.
Result? The felt is very soft...
...and boy, is it ever large!!
(Obviously, I need to re-engineer the template prior to my next attempt!) :)
In order to salvage this project...
...I arranged the wet felt into the folds and ridges that you see...
...basting them in place to dry.
Lessons learned?
1) If I don't pay attention to all of the particulars of a project...
...I will invariably need to make more than one of them in order to 'get it'.
2) I learn more from my failures than I do from projects that actually work!


