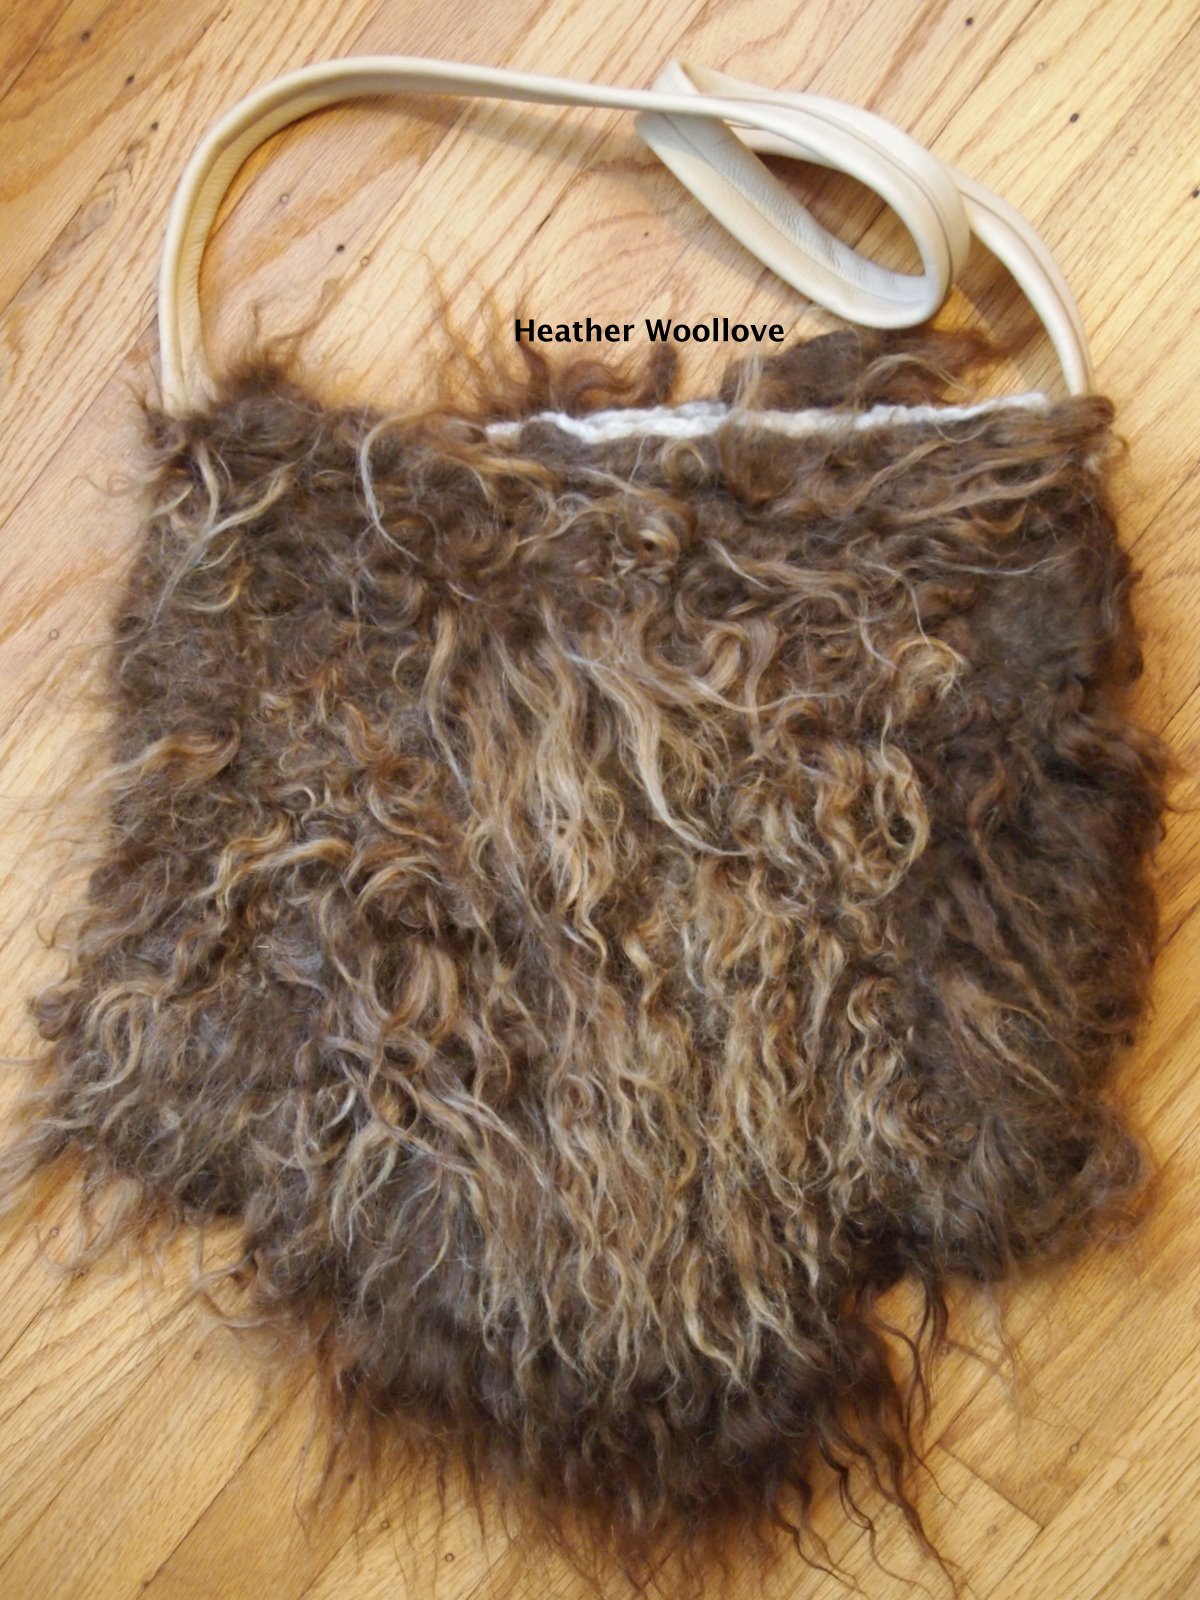
Showing posts with label Creative Felt Gathering. Show all posts

Friday, December 23, 2011

Red and White Raw Fleece Bag- Part 2 of 2


The finished bag...


...with all of its little 'boingy bits'! 


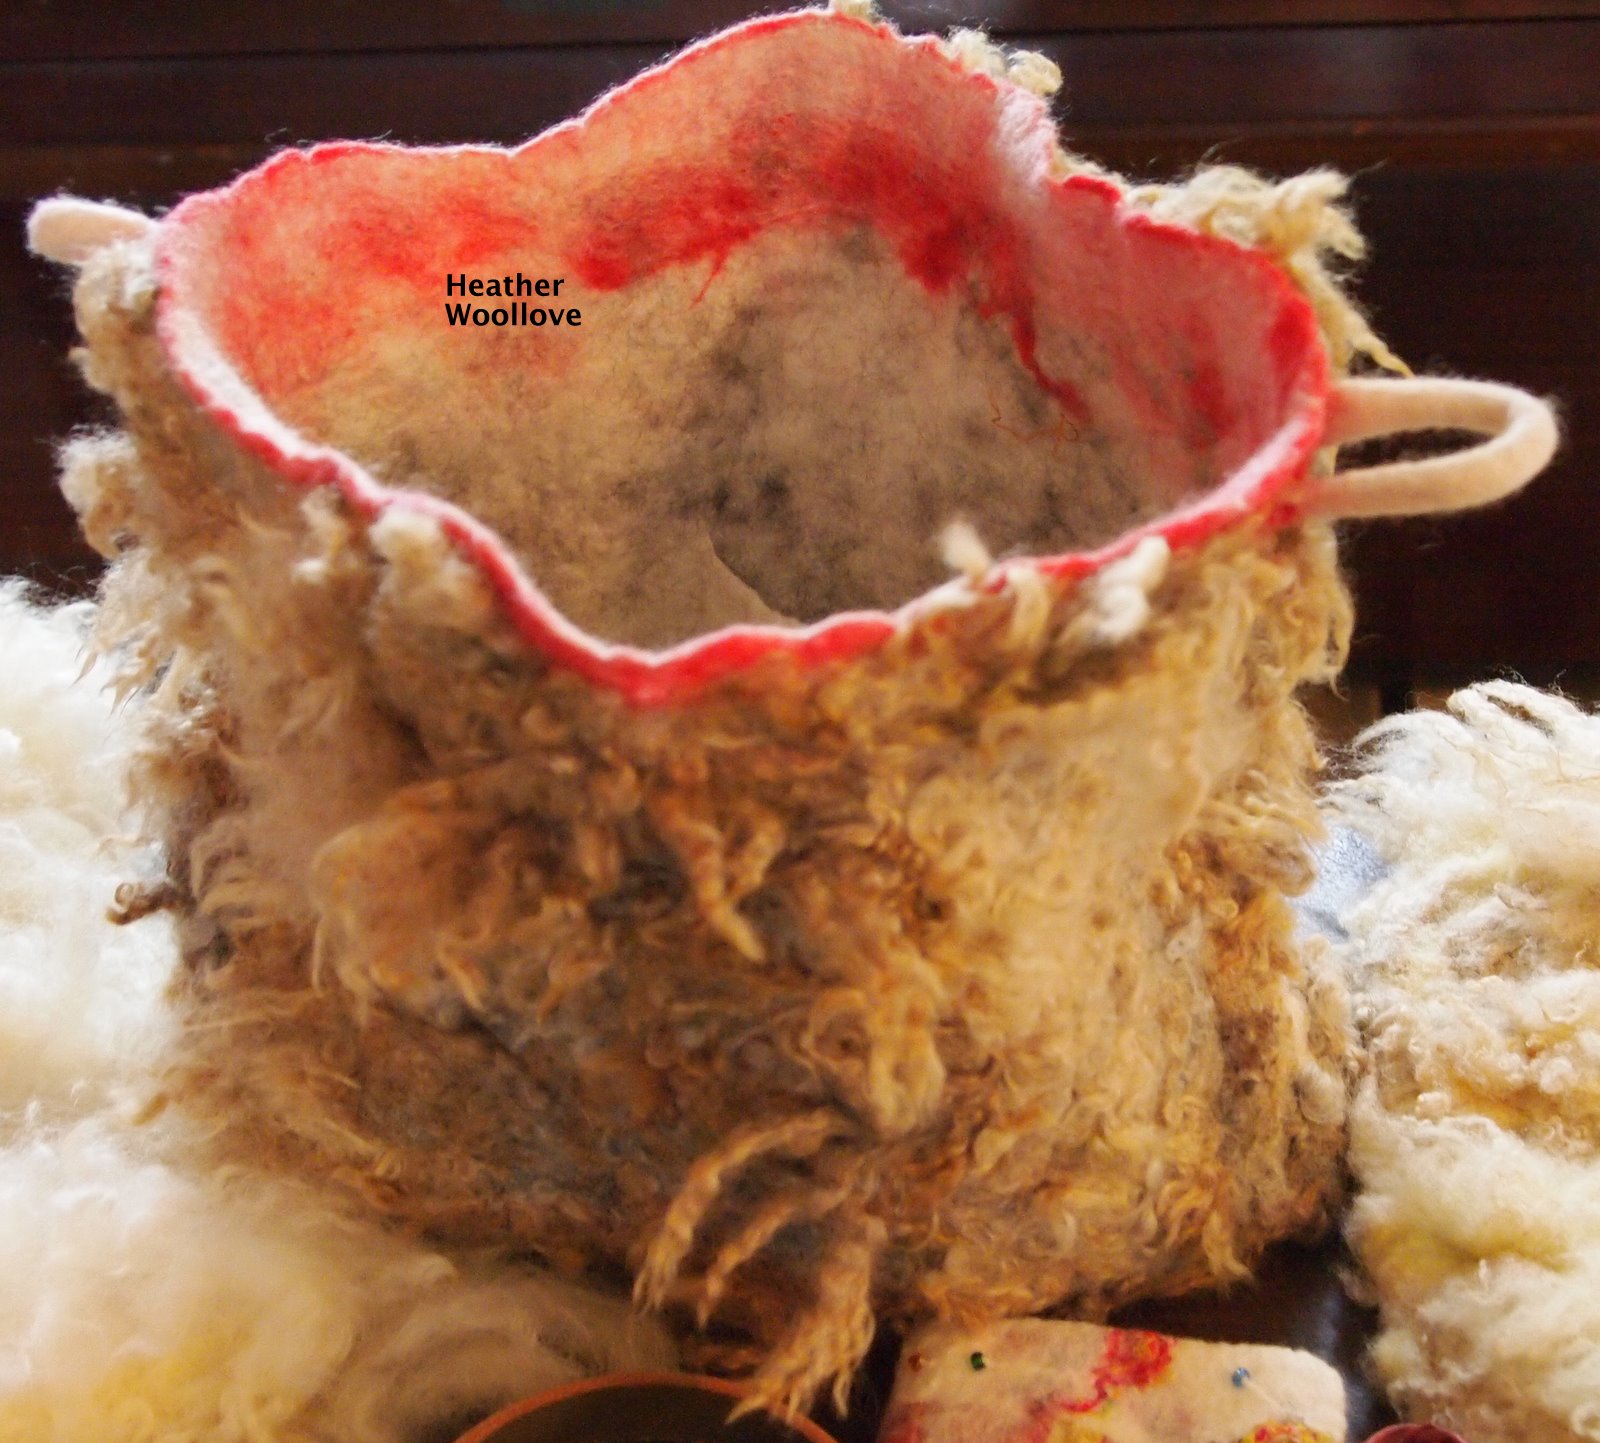
Don't these stitches look like Dr. Frankenstein did them?!?


The leather strap is long enough to be worn cross-body if desired.


Yet another Christmas gift out of the way...phew!!


After felting, I was relieved to see that my mystery fleece perked up proudly...

...and I like the combination of grey and brown in the finished felt.

The choice of a leather strap was the right one, I think...

...and I expect that it will be sturdier and less prone to discoloration...

...than a felted one would have been.

I also chose to use a pair of earth magnets this time...

...for a more subtle closure than my usual "one-button" one. :)

Next time: This year's handmade Christmas decorations...

...made by two of my daughters!!

Posted by Picasa

Thursday, December 22, 2011

Red and White Raw Fleece Bag- Part 1 of 2


Covering a resist with white and red wool roving.


Adding loops (for the handle) and raw mystery fleece. :)


The finished bag...sans handle.


Machine piecing a brown leather strap...


...and attaching it to the loop.


This is a purse that I started at the Creative Felt Gathering last summer...

...since which time it has languished, sadly, in a darkened corner of my studio. :)

I finally decided to finish it (for gifting this Christmas)...

...and at first thought, I decided to try a felted strap with toggles at each end.

Unfortunately, when I fashioned one from white and red roving...

...it just didn't suit.

I then decided to craft a wide leather strap...

...by cutting up a piece of brown leather with my rotary cutter, and piecing it...

...then machine stitching it to the loops on each side of the bag.

Next time: the finished purse.

Posted by Picasa

Saturday, November 5, 2011

Green Felt Bag With Seams- Part 1 of 2

Initial bag sketch...

...transformed into a resist.

Laying out roving for an inner pocket.

Adding the first layer of roving...

...for a tri-color bag.

Wrapping wool around the resist and adding additional layers of color.

Working this large (with the ends hanging over the sides of the table) was rather challenging. :)

Felting the bag with a pottery 'felting stone'.


At the Creative Felt Gathering this summer...

...I took a 'complex bag' class from one of my favorite people in the whole world...

...the fierce and loving Elis Vermeulen. :)

Prior to beginning a project, she recommends taking the time to sketch out your ideas...

...and I utilize this method often, feeling like it really helps me to crystallize my thoughts...

...and provide a 'plan of action'.

Something about the scale of Elis' own felt work (huge!) and her encouraging presence...

...always makes me want to push myself in these classes!

And, much like last year, I again challenged myself to try something quite large!! :)

For the exterior pockets (designed to be pushed inward after felting)...

...I hand-stitched three foam pieces to the main resist surface like 'flaps'.

I used a second method to make the interior pocket...

...covering a small piece of foam resist with several layers of roving, folding the top edge down...

...and then flipping it over onto the surface of the main resist.

Felting was a bit awkward due to the size of the piece vis a vis the size of my work surface...

...but I persevered anyway, and will show you the much altered finished bag next time! :)

Posted by Picasa

Thursday, October 27, 2011

Bag With 'Resist-Dyed' Accent- Part 2 of 2

Sewing the floral pocket lining to the inner bag flap.


The finished inside pocket.


Sewing on the resist-dyed accent piece.


The finished bag from the back...


...and in close-up (I think you can really see the purple/blue color blend here).


The bag front with tagua nut button...


...and up close.


When I returned home from the Creative Felt Gathering this year...

...with several lovely but modestly-sized resist-dyed felt pieces...

...I wasn't sure what I wanted to do with them!

Certainly, they would be delightful as framed art pieces...

...and some might even be large enough to use in fashioning a zippered change purse or two.

So far, however, this is the only one that I've used...

...because it seemed clear to me that this bag (in these colors)...

...was just meant for this particular piece of patterned felt! :)

I machine stitched it to the flap of the bag...

...sewing very close to the edges of the resist-dyed piece...

...and placing it in such a way as to allow for a centered button closure.

Posted by Picasa

Sunday, October 23, 2011

Chad Alice Hagen's Bark Scarf

Dyes and table preparation.


Some of Chad's sample scarves in different colourways.


'Our' dyepot. :)


Stitching the 'once dyed' scarf.


Pulling the strings tight.


After overdyeing and removing the strings...


...the finished scarf...


...both visually and texturally bark-like!


At the Creative Felt Gathering this year...

...I was lucky enough to take two dyeing classes with the amazing Chad Alice Hagen.

In this class, we made one of her famous bark scarves...

...using Japanese shaped resist dyeing techniques (Shibori).

Our group used chestnut dye for our first 'dip'...

...a notorious 'splitter' which, interestingly, turned into many colors after dyeing.

Then, after an afternoon of quite daunting hand-stitching...

...we were ready for the second dye pot.

As you can see...

...I used a lovely red for my second 'dip'.

The fun thing about this scarf is that it both looks and feels like bark when you're through...

...making it a special addition to any fall or winter wardrobe!


Posted by Picasa

Thursday, October 13, 2011

CFG Raw Fleece Purse #2- Part 2 of 2

After attaching the strap...back side.


The purse front.


With the addition of a button closure.


A close up of the tagua nut (corozo) button...


...notice how the brown Icelandic fleece has migrated through the layers of white wool roving to the inside of the bag?


This bag is delightfully wild...


...and I especially love the different shades of color in the locks...

...(could it be that this sheep visited her hairdresser regularly for highlights?!?!?!) Giggle.


I debated the color of the leather strap on this bag for some time...

...since I had pieces of both brown leather and natural deer-hide.

In the end, though, I decided that the brown was not exactly the right shade...

...and that the lighter strap echoed the paler color of the sunburnt fleece tips.

After machine stitching the strap to the purse...

...I used a pair of sharp scissors to cut a hole for the button closure.

Using waxed beading thread...

...I stitched all around the buttonhole opening for strength.

Then, keeping in mind the placement of the buttonhole...

...I hand-stitched a tagua nut button to the inside of the purse.

Posted by Picasa

Tuesday, October 11, 2011

CFG Raw Fleece Bag #2- Part 1 of 2

Laying out raw Icelandic locks onto a wool roving-covered resist.


Wetting them down and beginning to felt.


During felting...


...and here.


Making a leather strap from deer hide.


This is the second (of three) raw fleece purses...

...that I made at the Creative Felt Gathering this year.

I cut a template for the resist...

...and covered it with three thin layers of white wool roving.

Next, I added sections of raw Icelandic fleece...

...placing the cut ends 'down' onto the surface of the roving.

After wetting down and rubbing the piece on both sides for a loooooong time...

...I rolled it for a bit and finished felting it...

...taking care to keep the tips of the locks as loose and free as possible.

After returning home, I trimmed deer hide into a strip, stitched it lengthwise...

...and attached it to the bag for a shoulder strap.

Next time: the finished purse...

...with a tagua nut button closure.

Posted by Picasa