Friday, February 15, 2013

"In For A Penny, In For A Pound" Wet-Felted Hat

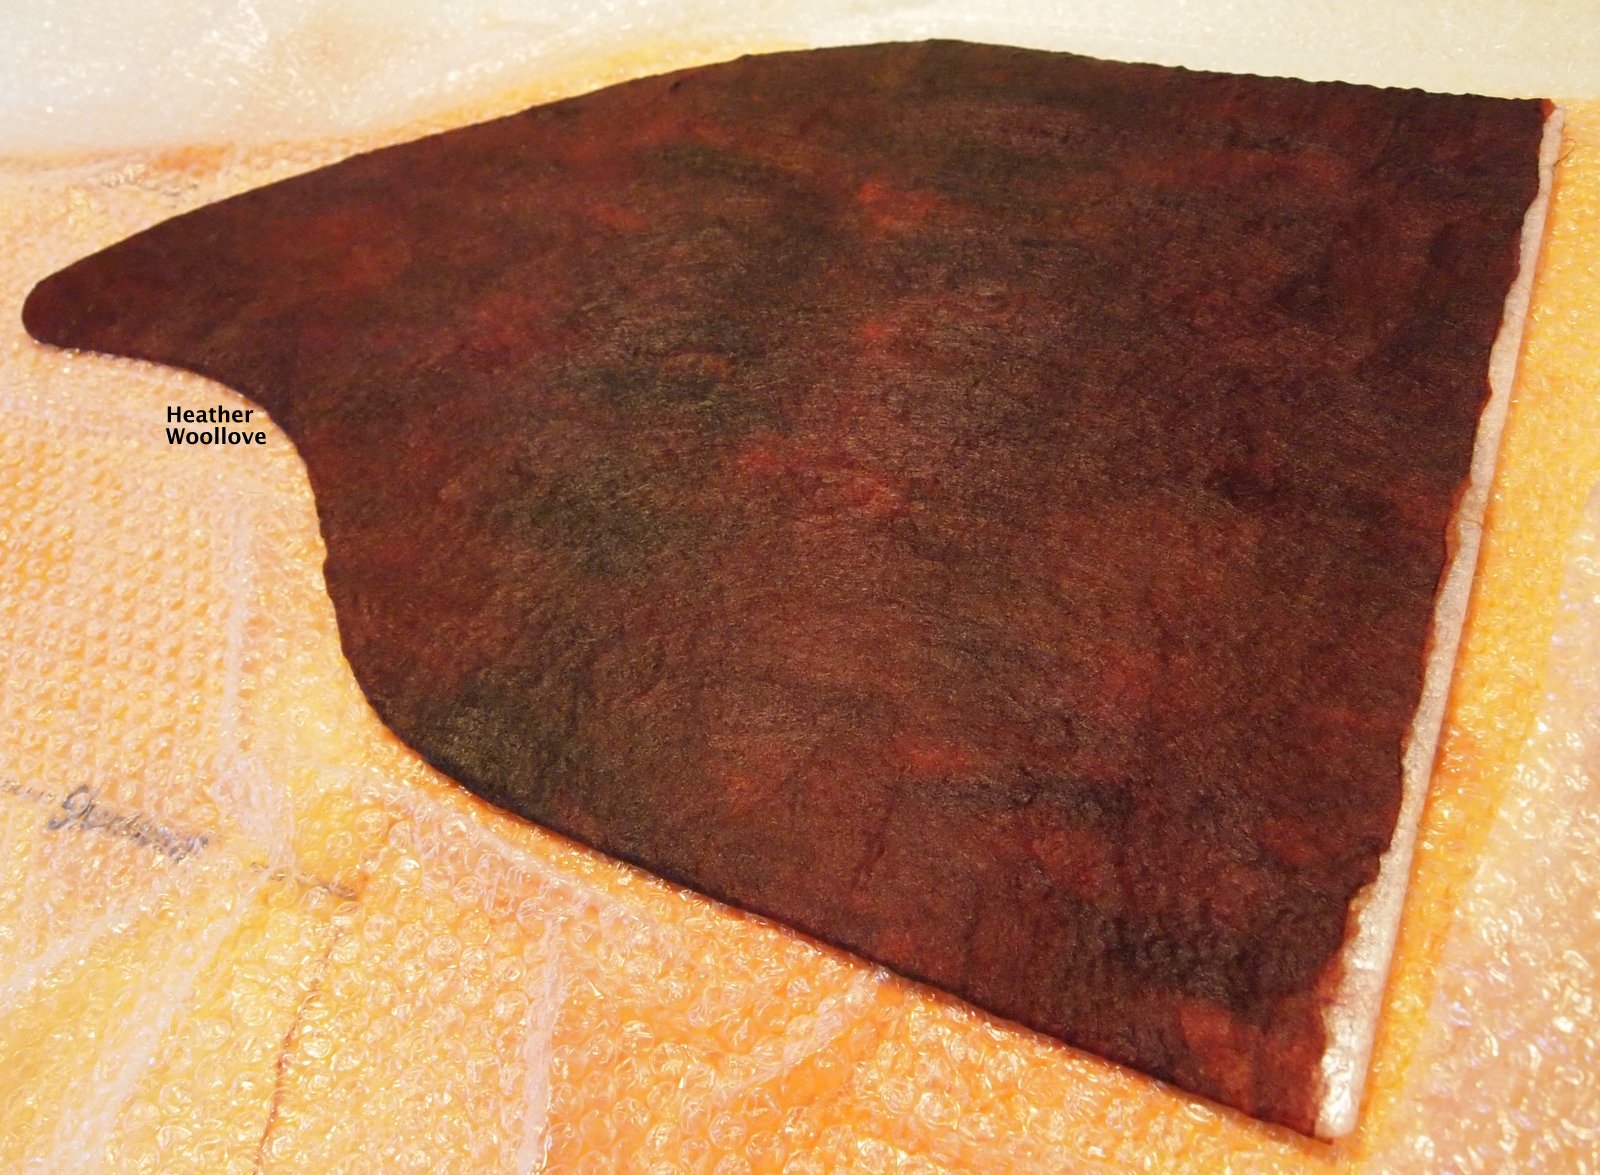
Laying out circles of merino wool...

 
...and covering them with luscious merino/silk blend roving...

...dyed by my friend, Joan Berner.

 
Flipping the resist to side two.


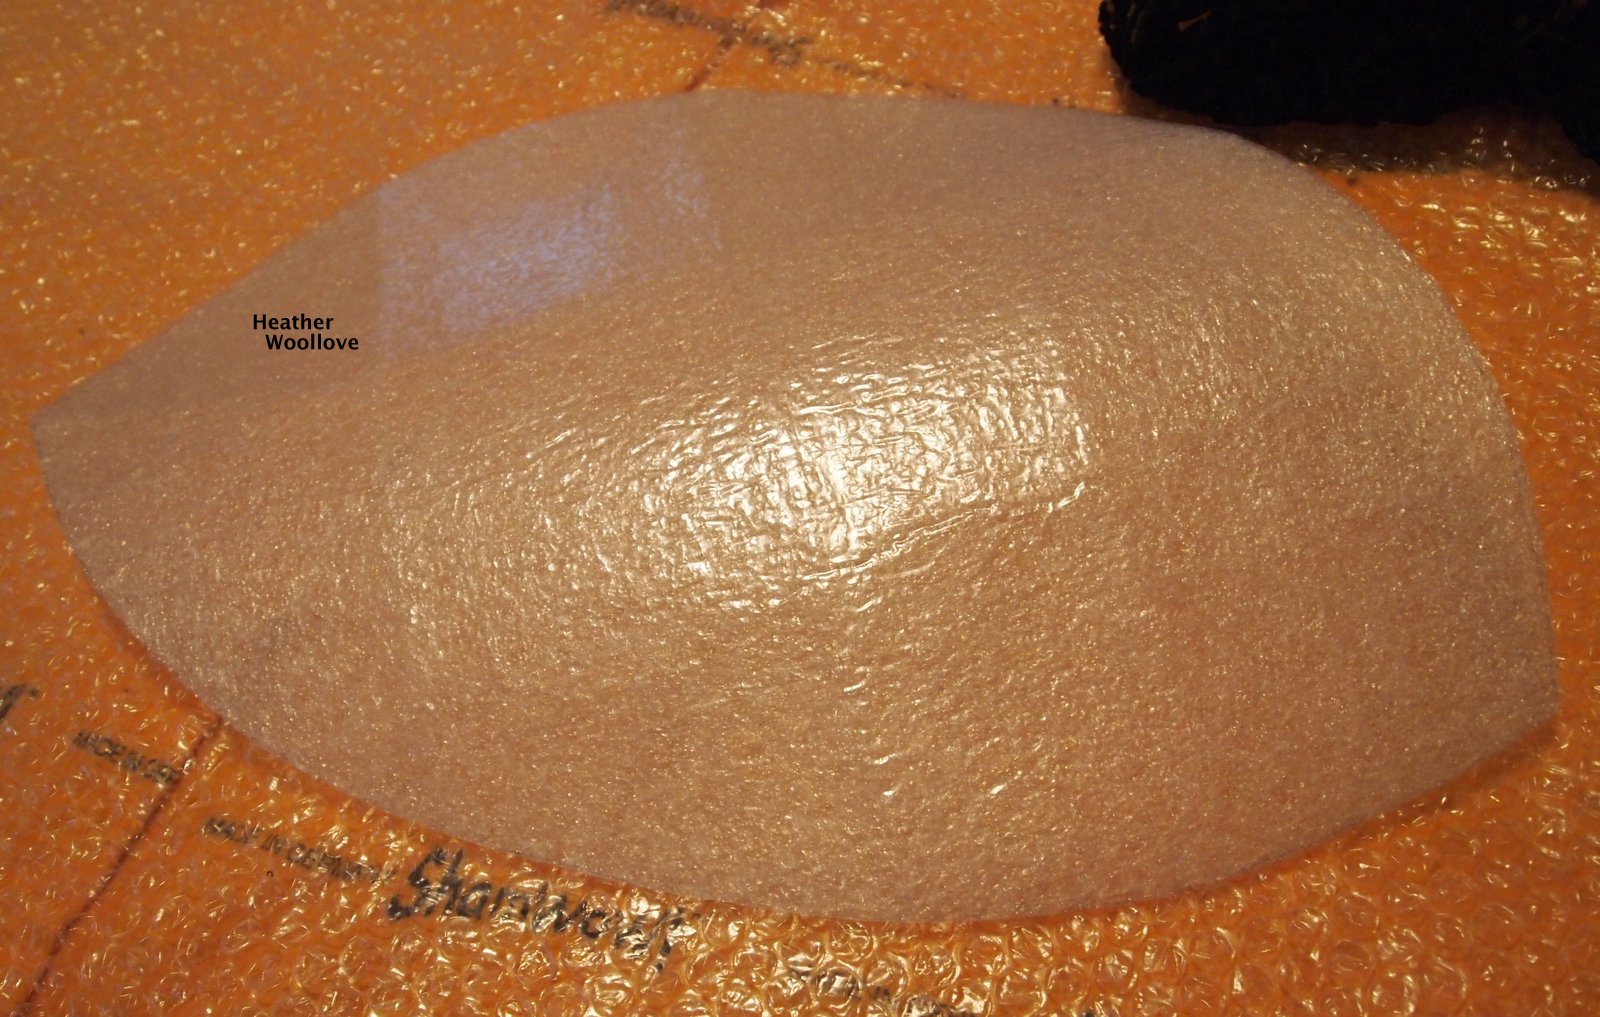
The fully wrapped (open) resist, prior to felting. 
 
Fulling the finished hat.

 
Applying clamps to 'fix' the shape while drying.

 
Removing the clamps.

 
Sewing a hem in the finished hat.

 
Two years ago...

...I made a wonderful hat under the tutelage of my friend, Dawn (a master hat-maker!).

Unfortunately, after wearing it throughout my trip to Germany in December...

...I somehow managed to wash it in the washing machine with a load of trip laundry! :(

Seeing as I had already 'tested the waters' with my previous two projects...

...I decided to throw caution to the wind and make another one...

...this time, for me!

Since I desired a soft, pliable hat that could easily be shaped...

...I laid out very thin layers of merino/silk blend roving.

I'm afraid that the finished hat is not quite rigid enough, however...

...because it didn't retain its 'telescoped' shape, once it had been worn a couple of times. (Alas!)

Next time: I go a little too far in the other direction...

...and make a really thick hat.

Drats...hats!!! ;)

Posted by Picasa

Wednesday, February 13, 2013

"Video-Inspired" Felt Hat- Attempt 2 of 2

Cutting out a foam resist.

 
Pondering the required size of a decorative band...

 
...and trimming two pieces (front and back) to the desired width.

 
Covering the resist with dark grey roving...

 
...and enclosing the patterned band in the process.

 
The finished hat...drying...

 
...and after trimming.

 
The 'helmet-like' hat in situ.

 
For attempt number two...

...I used a resist, wool roving, and a bit of patterned fabric from a re-purposed, flocked blouse.

(Trying to approximate the decorative trim in this video).

I think that the finished hat resembles a 'brain bucket' motorcycle helmet...

...and I fear that it's a bit short in the back.

Luckily, my friend likes it and has chosen to use it as a liner for the green hat...

...and now he swears that his head feels as warm as toast! :)

Posted by Picasa

Monday, February 11, 2013

'Video-Inspired' Felt Hat- Attempt 1 of 2

Cutting out 'house-shaped' pieces of finished felt...

 
...and long strips of felt in a complimentary color.


Sewing the strips to the pentagons to form sets...
 
...and joining the sets to form a whole.


Cutting strips of felt for a hat band... 
 
...and stitching it into place.

 
The finished hat...

 
...and in situ! :)

 
I have a dear friend who was looking for a very specific kind of hat for her husband at Christmas-time...

...and after 'coming up short' at her usual shopping haunts, she enlisted my help.

Now, those of you who know me, know that I am no hat-maker...

...but I decided to consider it a challenge! :)

This was her request:

"Make a hat like the one in this video." (!)

After pulling out a stack of felting books and looking through all of the different styles...

...I chose to try a version of Chad Alice Hagen's "The Marvelous Mitre"...

...from her peerless Fabulous Felt Hats book.

It seemed to have the same squared-off look at the top as the one in the video..

...and because I had leftover felt from this project that I could use...

...I figured, 'nothing ventured, nothing gained'! :)

Next time: I make a wet-felted stab at it.

Posted by Picasa

Saturday, February 9, 2013

Mixed Raw Fleece Winter Slippers- Part 2 of 2

The finished slippers...

 
...shown, first, with the wrong side out...

 
...then here, as they are meant to be worn.

 
A close-up of their nubby texture.

 
Notice the boingy little fleece appendages on the heels?

 
In my daydreams, they transform these lowly, earthbound slippers...

...into winged sandals, like those belonging to the Greek god, Hermes! Giggle.
 
With a dense layer of raw fleece and cushiony layers of roving...


...these slippers will keep my partner's toes toasty warm.

 
Working with raw fleece is always fun for me...

...and getting to use up a portion of my mixed 'bag 'o locks' was a good feeling, as well!

Because of the rust, black and cream roving that I used to wrap around the edges of the resist...

...the toes of the finished slippers have a rather calico cat look to them...

...while the rest of the slippers remind me of a pinto horse or a Dalmatian.

At first, my partner flirted with the idea of wearing them 'inside-out'...

...but the charm of the raw locks exterior won him over in the end.

After all, who could resist having wings at their heels? :)

Posted by Picasa

Thursday, February 7, 2013

Mixed Raw Fleece Winter Slippers- Part 1 of 2

Laying out lovely, spongy roving from Hog Island Sheep...

...for the footbeds and slipper tops.

 
Adding a thick layer of raw locks...

 
...followed by dyed merino roving.


Wetting out the piece. 
 
Adding several layers of 'oddball' roving in various colors...

 
...left over from earlier projects.

 
The felting commences.

 
Cutting the slippers apart, mid-way through felting.

 
The slippers that my partner felted for himself last year have already worn through...

...so I decided that it was time to make him a warmer and sturdier pair.

"And what could be toastier", thought I...

..."than a pair made with a thick layer of raw fleece?" Grin.

Using raw locks and roving left over from other projects...

...I laid out a soft and cushiony layer of Hog Island roving for the soles of the slippers...

...and the slipper openings.

Next, I added a thick layer of raw fleece to the resist...

...and covered it with layers of wool roving in various colors.

Next time: the finished slippers...

...with their 'Hermes-like' boingy bits! :)

Posted by Picasa

Tuesday, February 5, 2013

"Manly" Storage Envelopes- Part 2 of 2

The white envelope back side...


...and flap side (prior to adding the button).

 
The commercial felt pieces really 'stick out' from the envelope surface...

...providing an interesting texture.

 
Flap open (note the buttonhole reinforcement)... 
 
...and closed...


...with leather button.

The second envelope (flap side).

 
 After top-stitching...

...I trimmed the felt along the seam for a tidy look.
 
Always in a quandry about what to make for my male co-workers...

....I decided to create some sort of storage envelope for two of them this Christmas.

(Because even in a world of computerized records...

...there are still some important papers that a person needs to retain.)

Since it was my first time, working with commercial wool felt...

...it was interesting to see that the pieces merely felted 'to' and not really 'into' the finished felt...

...resulting in a highly textured surface.

To add to their masculine look, I cut and stitched a leather flap for each one...

...and used braided leather buttons for the closures.

Posted by Picasa