Showing posts with label hand-dyed silk gauze. Show all posts

Wednesday, August 22, 2012

Sleeveless Nuno 'Dryer Felt' Jacket- Part 5 of 5

The neckline and 'rose detail' in close-up...


...and on my daughter, L.
 
Because the felt was designed to be reversible...

...the collar was easily made with a single fold.


A view from the side...

 
...and, full-length, from the front.


Here's the 'kick pleat' in back...

 
...and a better view of the collar and 'rose'. :)

 
I think the colors rather suit her...don't you?!? :)


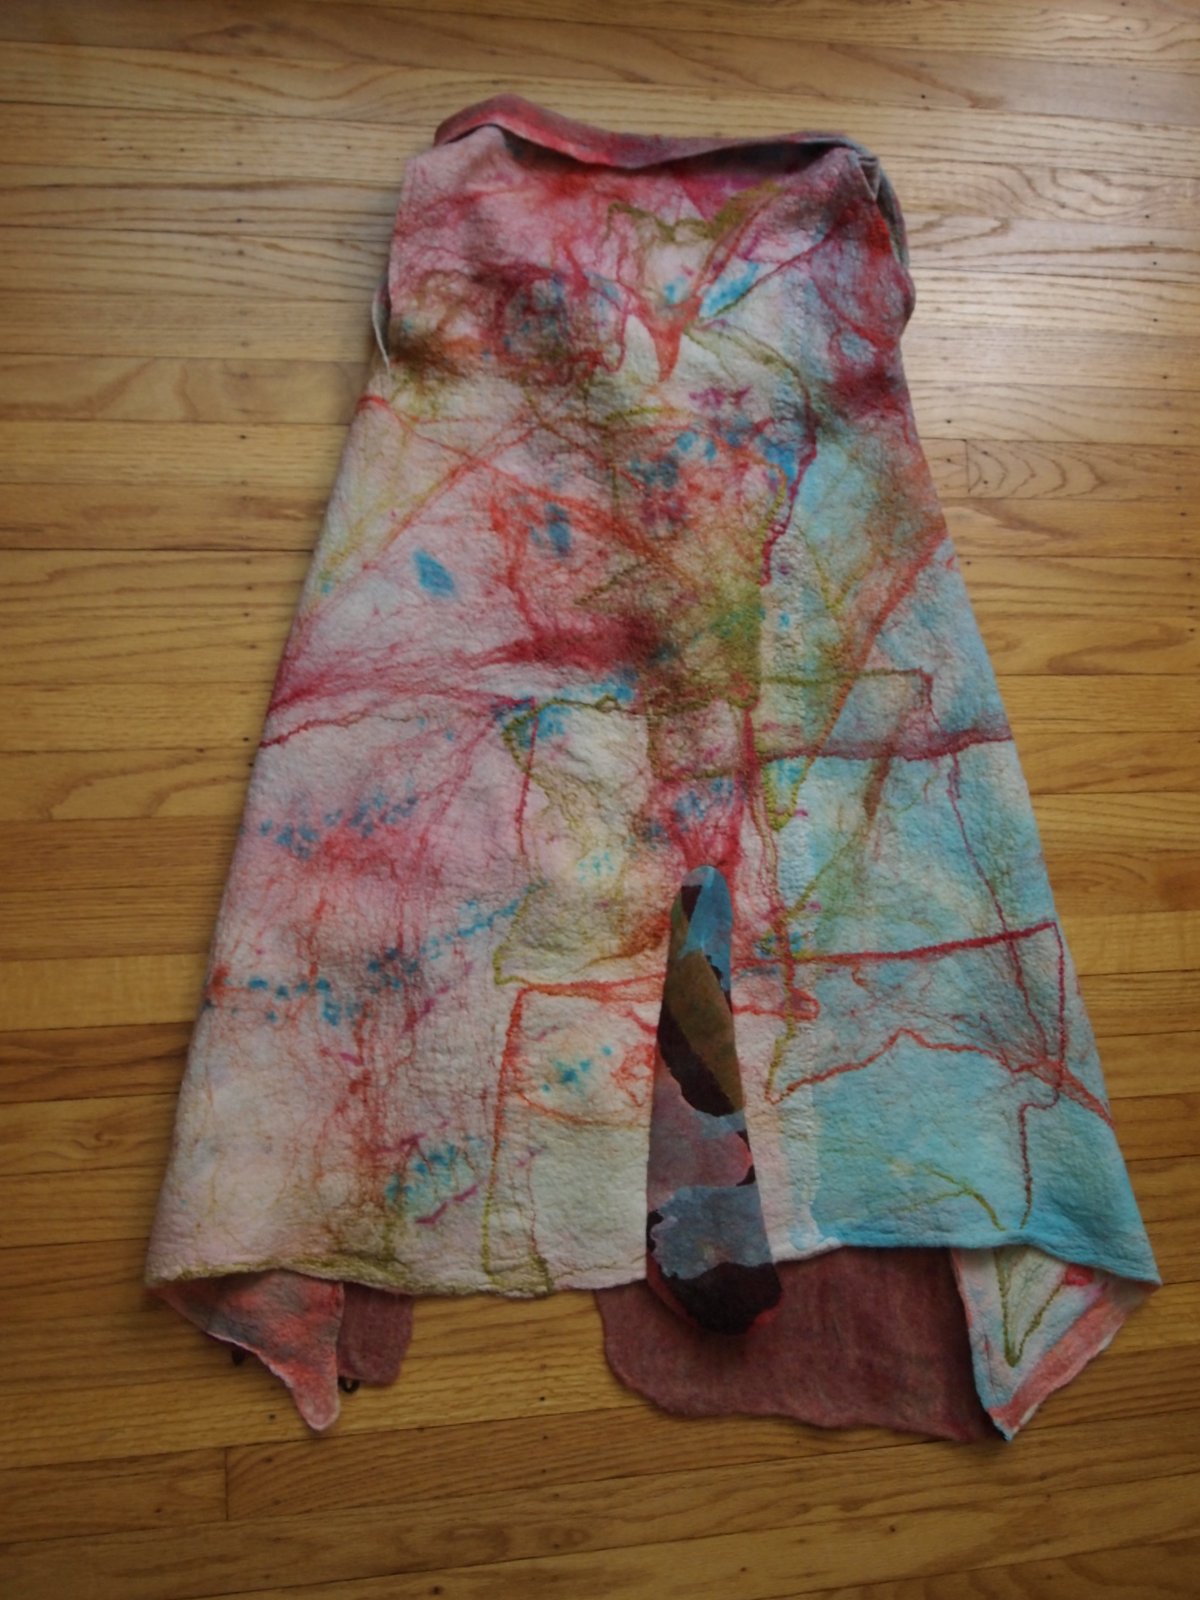
While shaping the collar of the jacket...

...I fashioned one dangling piece into a 'rose-like' accent.


The burgundy-colored felt provides additional coverage...

...and its bold color lends visual interest.


A small triangle, inserted into the back as a kick pleat...


...brings the darker color to the back side of the jacket, as well.


I'm not exactly sure how utilitarian a garment like this will be...


...but I think it might be nice to wear over a long-sleeved knit top and jeans...


...once the cool winds start blowing again!

Posted by Picasa

Monday, August 20, 2012

Sleeveless Nuno 'Dryer Felt' Jacket- Part 4 of 5

Covering the silk with a layer of red wool roving...


...in the irregular shape of the silk. 
 
Adding a thin layer of white roving...

...perpendicular to the first.


The finished ancillary felt piece. 
 
Drafting a rudimentary jacket pattern on my 'daughter mannequin'...

...using an old, flannel sheet.


Making a 'kick pleat' from the ancillary piece of felt.
 
The finished jacket (front)...

 
...and back.

 
I had the rather ambitious notion...

...of turning my dryer felt shawl into a jacket for my daughter.

Now, as most of you know...

...I'm not much of a garment-maker! :(

Using her as a living dress form, though...

...I think we did a fair job on a very simple silhouette.

Next time: my beautiful daughter models her sleeveless jacket...

...and I think you'll agree that it looks much better on her, than it does on the floor!! :)

Posted by Picasa

Saturday, August 18, 2012

Sleeveless Nuno 'Dryer Felt' Jacket- Part 3 of 5

More texture on side two.


 The red circle is a concentrated bit of the original silk cocoon!


The back side of the finished felt with dyed tussah silk circles.

 
After felting, the circles look a bit like "Mr. Bill" "Oh, noooo!" mouths, don't they?!? Grin.

 
I love the saturated color burst you get from the thick edges of dyed silk hankies.


During felting, much of the color has washed away on this side, too.

 
Laying out another piece of dryer felt at home...

 
...using leftover bits of printed and dyed silk...

...plus a layer of black silk gauze.

 
Since the piece of felt that I made in Portugal wasn't quite large enough for the project I had in mind...

...I set about creating a complementary piece of felt, once I was home.

Using small sections of leftover silk instead of silk hankies this time...

...I covered them with silk gauze prior to laying out the wool fiber.

Next time: garment construction begins!!

Posted by Picasa

Thursday, August 16, 2012

Sleeveless Nuno 'Dryer Felt' Jacket- Part 2 of 5

The fully laid out piece...

 
...as it's carefully rolled up in plastic...

 
...then trussed and wrapped in a towel for several short 'bursts' in the dryer.

 
Voila...it's time for fulling!


The front side of the finished piece.

 
A close-up view of some of the dyed silk hankies...

 
...reveals that they've retained their color beautifully...

 
...and made lovely, cobwebby designs on the surface of the finished felt!

 
Please take note of the (much paler) color of the finished felt...

...now that some of the food dye has washed away.

The piece is still pretty vibrant, of course...

...but at least now it 'won't put your eyes out' when you look at it! Grin.

The benefit of using silk hankies on both sides of the felt...

...is that anything you make with it will be completely reversible.

Next time: the back side of the finished felt...

...and an ancillary piece of felt is begun!

Posted by Picasa

Tuesday, August 14, 2012

Sleeveless Nuno 'Dryer Felt' Jacket- Part 1 of 5

Nienke and Annemarie help me to stretch out dyed Mawata silk hankies.

 
Next up: a layer of hand-dyed silk gauze (in two colourways)...


...followed by a layer of wool roving. 
 
Edging the piece with a bright pink splash of merino/silk blend roving.


Soaping and wetting out the project...
 
...then adding a second layer of hand-dyed silk gauze.

 
More stretched silk hankies...

 
...and smoke rings of dyed tussah silk...

...make for a real 'fiber sandwich'!!! :)

 
Since I never know exactly what I'll get up to in a felt-making workshop...

...I always try to pack a few orphaned supplies from my stash cupboard...

...to see what might become of them in an unfamiliar setting! :)

For my class in Portugal, I took along pieces of silk gauze that I had hand-dyed some time ago...

...both with natural, cake icing dyes and with synthetic, acid dyes.

You'll notice that the colors start out quite wild-looking...

...but the icing dyed sections will fade quite a bit by the project's end.

Since this is another dryer felt project...

...I began with a layer of thin plastic on the table surface.

Nicola is a big fan of putting designs on both sides of her nuno felt projects...

...and now, I am a convert to this idea, as well!!

Starting with quite widely stretched-out dyed silk hankies...

...I made designs on the surface of the plastic.

A layer of silk gauze, one of wool roving and another layer of silk came next...

...then more silk hankies and a smattering of tussah silk fiber circles.

Next time: the project is rolled up and felted in the tumble dryer...

...and a piece of felt is 'born'!! :)

Posted by Picasa

Thursday, April 5, 2012

Hand-Painted Silk Tote Bag- Part 2 of 2

Turning the tote right-side out...

...and looking a little 'Alien'-like in the process! :)

 
The felted bag prior to trimming...

 
...and after trimming (back side)...


...and front. 


Using white roving behind the painted silk helps to preserve the delicate design. 
 
Placing roving around the edge of the resist keeps the raw fabric edges from showing.


This side looks rather 'planetary', I think...


 ...while this side reminds me of diatoms swimming happily in the sea!
 
Unlike some of my other totes...

...with this one, I wanted less of an open 'market tote' and more of a 'project tote'.

So, in order to keep my friend's knitting needles and works-in-progress from falling out...

...I angled the layout of the handle to make it a bit more secure.

I like that so much of Melissa's beautiful hand-painted silk is visible in this project...

...and I hope that she has it filled with yarn as we speak!! :)

Posted by Picasa