Showing posts with label ceramic buttons. Show all posts

Thursday, March 19, 2015

Felted 'Mixed Wool' Envelope- Part 2 of 2

The finished project...drying.


                                                  Cutting a circle of leather...


                                          ...and punching stitching holes into it...


                   ...for use as a 'button reinforcement' on the inside of the envelope.


                                                The finished project (open)...


                                                            ...and closed.


                                                       The envelope back.


                                       Made as a retirement gift for a co-worker...

    ...it's just the right size to hold 'farewell cards' and other personal memorabilia.


Tuesday, February 17, 2015

Polka Dot Silk Scarflette- Part 3 of 3

Fulling the piece.


                                    The finished silk hankie-embellished scarflette...

                                              ...with bits of re-purposed silk.


                                                        On the reverse side...


                        ...the dyed Mawata hankies resemble colorful spider webs.


                                    The embroidered flower on the ecru silk piece...

                             ...is a detail from the original re-purposed garment.


                                 With two differently decorated sides to this scarflette...


                                  ...it's easily reversible for a radically different look.


                                    For a closure, I added a large ceramic button...


                       ...and reinforced it with a circle of black leather on the back...


                       ...then hand-edged a simple buttonhole with embroidery floss.


                                                    The finished scarflette!


                                   Next time: I repeat this project in very different colors.

Wednesday, December 10, 2014

Machine-Embellished Nuno Scarflette (Prototype)- Part 3 of 3

Depending on whether you fold it in half...


                                                            ...one way...


                                                             ...or the other...


                                       ...you can achieve an entirely different 'look'.


                                                You can also change things up...

                                     ...by wearing one end of the scarflette to the left...


                                                       ...rather than the right...


                                       ...or by overlapping the ends in a manner...


                                           ...which allows the button to show...


                                                           ...or 'not show'! :)


                                                  Having options like this...


                                             ...makes it possible for the scarflette...


                                  ...to coordinate with lots of different ensembles! :)


Monday, December 8, 2014

Machine-Embellished Nuno Scarflette (Prototype)- Part 2 of 3

The finished scarf...


                                             ...after machine embellishment.


                                                        Using red thread...


                                                                ...I traced... 


                                                               ...or outlined...


                                                 ...many of the scarf 'features'.


                                                            For the closure...

                                       ...I crocheted a loop from red merino yarn...


                                         ...and added a handmade ceramic button.


                                    Next time: I'll show you several ways to wear it!

Friday, August 16, 2013

Portuguese Pencil Roving Purse

Taupe-colored, wool "un-spun" (AKA pencil roving)...

...from a Portuguese fiber mill...


...provides the design element for this bag.

 
It's covered with several layers of wool roving...

...then felted, cut open, and flipped right-side out.

 
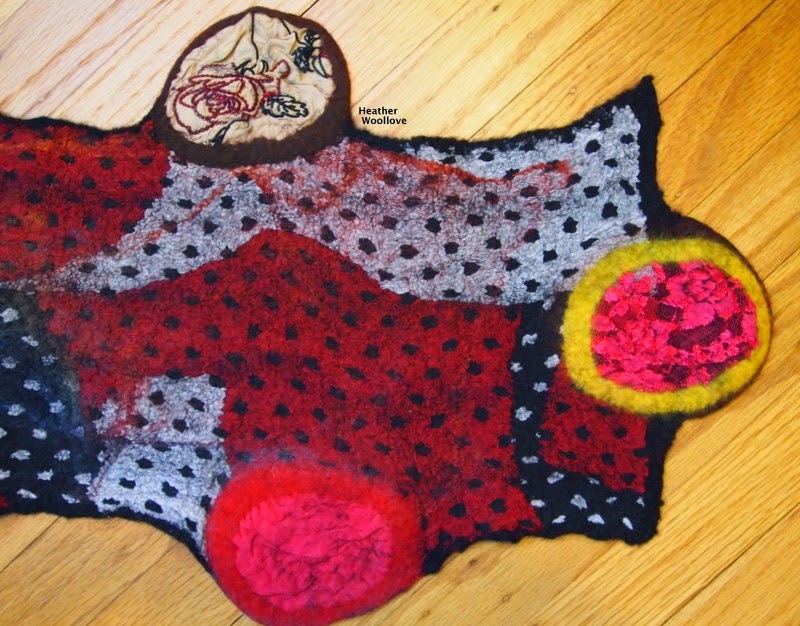
The finished felt piece...

...on display at our class 'open house'.

(Shown here with a classmate's plant- and rust-dyed scarf.)

 
The finished bag (back)...

 
...and front...

 
...with ceramic button...

...and 'suede-side-out' leather buttonhole and strap.

 
The finished purse.

 
While in Portugal, I fiddled around with some wool pencil roving...

...that I found in a local fiber mill.

After placing it on the surface of the resist...

...I covered it with layers of white wool roving and felted it inside-out.

The suede side of a piece of black leather was used to fashion the strap and buttonhole...

...and a ceramic button completes the project.

Posted by Picasa

Sunday, April 7, 2013

'Painterly' Two-Layer Purse- Part 3 of 3

After tucking the lining into the interior of the bag...

...a view of the purse back...

 
...and front.

 
Fashioning a leather flap for a closure...


...and carefully cutting out the center of the stitched buttonhole. 
 
The handmade leather strap and flap are attached next...

 
...and the button is sewn on.

A view of the purse front...


...and back
 
The lining of the purse...

...with pockets.

 
After sewing the open end of the lining closed...

...I tucked it into the body of the bag...

...to create a two-layer purse.

Next, I machine stitched around the top of the purse...

...to hold the lining in place.

From sour apple green leather, I fashioned a strap and flap...

...and stitched them both to the bag.

Finding a ceramic button in 'just the right color'...

...was the icing on the cake!

Posted by Picasa