Showing posts with label needle-felted. Show all posts

Tuesday, December 27, 2016

A Christmas Stocking for Hayes- Part 2

Layers of darker green roving...

...are applied to the project surface...


                                               ...and the stocking is wetted out.


                                                 A 'candy cane' hanging loop...


                                ...is fashioned from white and red merino roving...

                                        ...and added to the mouth of the stocking.


                                                     Mid-way through felting...

                                                     ...the resist is removed...


                                         ...and the project is turned right-side out.


                         The stocking is rubbed and rolled in various orientations...


                                                     ...as the felting continues.


                                                Next time: the finished stocking!

Sunday, December 25, 2016

A Christmas Stocking for Hayes- Part 1

With a few quick stabs of a felting needle...


                                   ...I anchor yarn 'garland' and roving 'ornaments'...

                            ...to the surface of my colourful pre-felt Christmas trees.


                                             They're turned to face the resist...

                ...as is a cursive 'Hayes' (also anchored to a piece of white pre-felt).


                                                     The body of the resist...

                       ...is covered with layers of wool from a sour apple green batt...


                       ...and white merino roving is added to the white pre-felt top.


                                              Three more trees are fashioned...


                                             ...for the back side of the stocking...


                                           ...and the project is flipped to side two.


                         I lost focus, somehow, after I placed the trees on side two...


            ...and instead of pulling the wool in and around the edges of the resist, first...

               ...I remembered only after I had already added wool to the second side.


         The end result is that the finished stocking doesn't look completely seamless...

                                          ...even though it is. (C'est dommage.)

                                                     Next time: felting begins!

Sunday, September 25, 2016

Mr. Fox- Part 2

Mr. Fox is looking a bit more animated now...


                                                      ...and I'm happy to see...


                           ...that the tail (engineered to help hold him 'upright')...


                                                             ...really works!!


                                                        Once he's fully dry...


                           ...I stuff him with commercial wool scraps and roving...


                                                ...and needle felt his eyes.


          (I don't want to add anything that can be pulled off by a baby and eaten!)


                                                          I stuff him firmly...


                                                             ...but softly...


                                                       ...so that little hands...


                                                      ...can easily grasp him.


                              I'd like to make a couple of other long-tailed animals..


                                                  ...for my 'Honey's toy box'!


Friday, September 11, 2015

"Caps For Sale" Hat- Part 3 of ?

Assembling pencil roving, yarn and merino wool...

...for the monkey's fur and hair.
   

                                    Cutting commercial pre-felt into narrow strips...


                                             ...for my 'checked cap' design.


                                           Drafting a hat pattern on craft paper...

                                                  ...and then tracing around it...


                                ...to create a resist out of foam floor underlayment.

                                    (Yes...those are monkey hands at the resist bottom!) :)


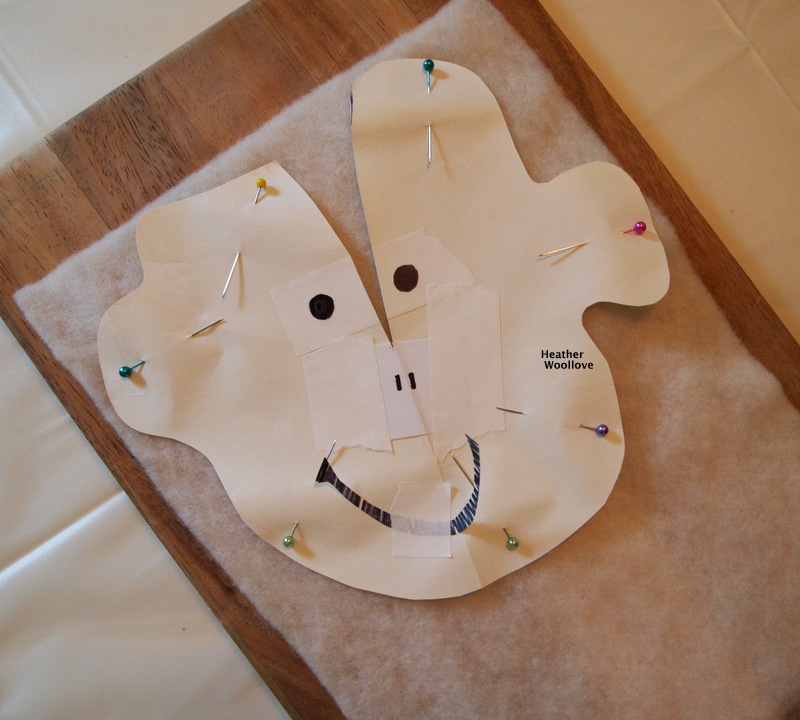
                                       Drawing a monkey face pattern on paper...

                                ...and adjusting its shape and position for a good fit.


                                     Pinning the pattern to a layer of white pre-felt...


                                                         ...and cutting it out.


                                             Cutting holes in the paper pattern...

                      ...to establish the position of the eyes, ears, nose and mouth...


                                  ...and then needle-felting them quickly into place...

                                          ...using black merino yarn and pre-felt.


                                                       The completed face. :)


                         Assembling my preliminary sketches, a print from the book...

                                               ...and the monkey face pattern...

                                                  ...for inspiration as I work.


                                           Next time: I begin the 'checked cap'!

Monday, September 7, 2015

"Caps For Sale" Hat- Part 1 of ?

One of my all-time-favorite children's books...

...Caps For Sale by Esphyr Slobodkina...


                   ...was the inspiration for my "Mad Hatter's Parade" hat at Fling this year!


It took months of planning...


                                                 ...and many weeks of work!


                                   Starting with a small, foam underlayment resist...


                                            ...I covered it with wool from a batt...


                                      ...containing lovely, multi-colored cotton dots.


                                         Using a small round dish as a template...


                                      ...I cut a circle from the partially felted wool...


                                                      ...removed the resist...

                                           ...and continued on with my felting.


                                     'Rounding off' the opening of the finished cap...


                                      ...and then tucking it into position, for drying.


                                                 With wool from a yellow batt...


                                            ...(again with colored coton dots)...


                                               ...I fashioned an identical cap...


                                                    ...using the same resist.


                                                   The yellow cap, drying...


                                                     ...and the finished pair.


                                   As you might expect from the book illustration...

                                ...this project required the creation of lots of caps!

                                                 Next time: I switch colors. :)