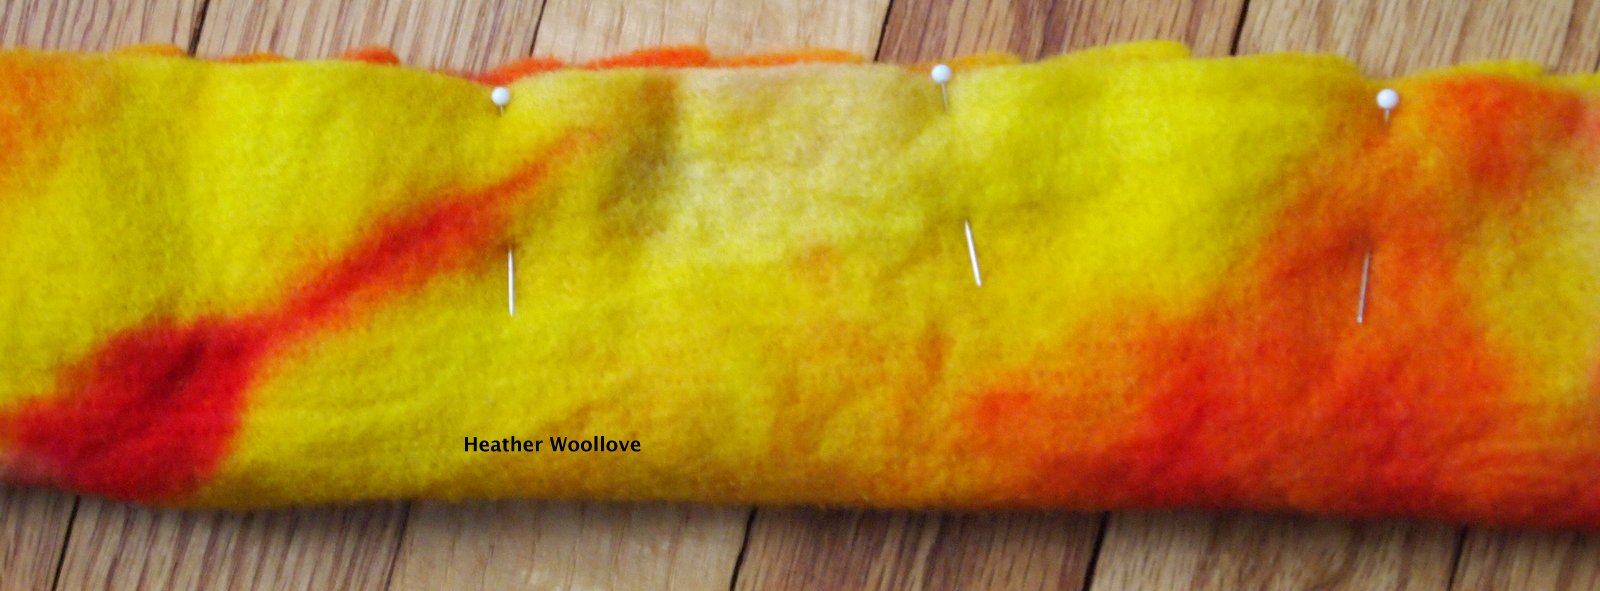
Cutting a long strip of pre-felt...


...and folding it in half.

Making semi-regular cut outs in the felt.


The scarf after trimming.


Adding knots with wool yarn...


...and in close-up.


Preparing to felt the scarf...


...and wetted out...mid-felting.


This is a quick and easy project...
...using hand-dyed 'needled felt'...
...aka 'pre-felt'.
Cut a long strip of pre-felt...
...approximately 6-inches wide.
Next, fold it in half...
...and pin it into place.
With sharp sewing shears, make regular cuts along the length...
...(and here is where you can get creative!)
You can shape the 'legs' differently than mine...
...or make them shorter or longer, if you like...
...leaving more or less of a center section. :)
For interest, once it was trimmed...
...I added a few clumps of knots with coordinating colors of wool yarn...
...using a large-eyed needle.
Next, lay it out on a piece of bubble wrap...
...wet it out, and cover it with the other half of the wrap...
...and begin felting!
Since it is already partially felted...
...it won't take long to finish this process.
Just be sure to keep it flat, and the 'legs' away from each other...
...until you are sure they won't stick to each other and felt into a bumpy mess.
Next time: the finished scarf...
...and you'll see why I call it 'the centipede'!! :)
16 comments:
Oh nice bright colors Heather, this will be interesting to see how it comes out :)
ooooh, this will be a fun finished project!
I had so much fun working with prefelts when I made my Fascinator with Jone. I had never used them before. Lots of fun!
I love visiting here Heather, you always have the most wonderful projects on the go. Thanks for the anniversary wishes:)
xo xo
Linda
Karen--Thanks!
Andrea--I actually used a piece of one of Jone's pre-felts for this scarf! (I wanted to give her a 'shout out', but she really doesn't have a blog or website.)
Linda--Thank-you...you're so sweet!
I'm cautiously optimistic. ;-)
Kathryn--You make me laugh!! XXO-
Ok, this is too cute, I can't wait to see it finished!
But what you are using already looks done, I need to come back for the next part!
It certainly looks good at this point!
Melissa--Thanks!
Vivian--Yes...pre-felt is partially felted, so it holds together and is easily cut, but it's still very soft and would rip easily, too. I think you'll be surprised when you see the finished scarf. It's a very different (pebbly) look!
Rachel--Thanks!
I'm so interested in this. It looks great so far. What actually felts it? Hot water in the bubble wrap, or do you put it in the sun. I'm a little confused. :)
Thanks, Jess! It's felted by wetting it with hot, soapy water, and first rubbing it through the bubble wrap (letting the bubbles do some of the work!), then rolling it in bubble wrap until it starts to shrink and is less likely to felt to itself...and then rolling and rubbing and throwing the 'naked' scarf (checking the 'legs' every few minutes to keep them from rolling or folding and felting to themselves or each other), until it is fully felted.
This looks fun.. think my girlie would like this. Lovely colours
x
Deborah--It's a fun scarf. I think your daughter would love it! :)
have to try this, it looks like lots off fun!!
Janine--Oh, do! I would love to see how yours comes out!
Post a Comment