Sunday, November 30, 2014

Silk-Embellished Travel Purse- Part 2 of 4

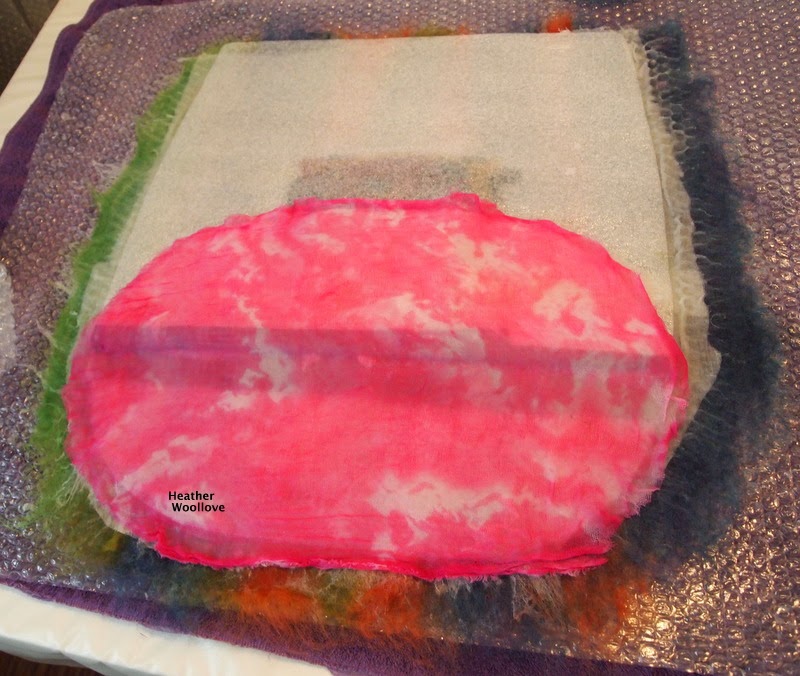
Laying out an internal pocket on side two.


                              Covering the entire resist with a layer of wool roving...


                                               ...plus a layer of cotton scrim.


                                   Adding bright roving stripes to the bag surface...


                                             ...and also to its 'flanged' bottom.

          (Thin plastic is used to keep the bottom from 'felting into' the bag sides.)


                          Reinforcing the top of the purse with a layer of yellow wool...


                                         ...folding it down to make a neat edge...

                            ...and adding loops on each side for a strap attachment.


                                                  Covering the bright wool... 


                                               ...with a layer of black roving...


                                          ...and, after flipping the bag over...


                                   ...covering the first side with black roving, as well.


                                                 In the making of this purse...

                        ...I incorporated 'odds and ends' which I had in the studio.

                  Scraps of pre-felt were used to make colorful internal pockets...

               ...leftover bits of cotton scrim were pieced together to make layers...

           ...and neon roving was incorporated into the bag in a 'supporting role'...
                
                 ...(blending with black to create a slightly heathery shade).

                             Next time: sections of patterned silk are added...

                                             ...and the felting is begun!


Friday, November 28, 2014

Silk-Embellished Travel Purse- Part 1 of ?

Piling pre-felt scraps onto a small pocket resist...


                       ...and flipping it over onto the surface of the main bag resist.


                                         Temporarily removing the pocket resist...

                            ...to add an additional layer of pre-felt as reinforcement.


                         Covering the whole shebang with a layer of white roving...


                                              ...and wetting the project out.


                           A layer of cotton scrim is applied next (as structural support)...


                                      ...and wide stripes of colorful wool are added.


                                             After flipping the bag to side two...


                         ...a layer of hand-dyed scrim is placed on the 'flanged' bottom...


                                                 ...wool roving is added...


                                              ...and the project is wetted out.    


                                        The 'rays' of colored roving from side one...

                                     ...are then wrapped around the resist bottom.


                                   Next time: The process is repeated on side two...

                            ...and felt loops are fashioned as strap attachments.

Wednesday, November 26, 2014

"Horned" Winter Hat- Part 3 of 3


The finished hat...


                                                           ...shown here...


                                                             ...in daylight...


                                                 ...in order to properly parade...


                                                ...its rather shocking colors! :)


                                       The sturdier wool that I used for the horns...


                                     ...provided a firmness and structural support...

                                       ...that superfine merino would not have...


                                        ...and I think you have to look pretty hard...

                                                ...to see the color variation.


                                                       To get a good fit...

                                ...I hand-stitched the hem after trying it on for size.


                                              So that you could see it in situ...

                                       ...I enlisted my eldest daughter as a model...


                        ...and afterwards, she decided that she rather enjoyed wearing it...

                                   
                                              ...and would like to keep it. :)


                                                  It suits her, don't you think? 


Monday, November 24, 2014

"Horned" Winter Hat- Part 2 of 3

Applying pre-felt bands as embellishment...


                                        ...wrapping their 'tails' around to side two...


                                                ...and wetting the project out.


                                         Side two, with its own pre-felt additions.


                                                 Rolling and felting has begun!


                                               Cutting the partially felted hat...

                                                ...to remove the foam resist.


                                     Slowly, the horns begin to reveal themselves!


                                          An inside view of the hat during fulling.


                                         The layer of silk gauze at the open edge...

                                  ...was added to provide extra comfort during wear.


                                                 Next time: the 'big reveal'! ;)

Saturday, November 22, 2014

"Horned" Winter Hat- Part 1 of 3

Creating a cardboard hat pattern...


                                        ...and cutting a foam underlayment resist.


                                     Adding a strip of silk gauze, just at the bottom...


                      ...then covering the entire resist with layers of superfine merino...


                                           ...and at the top (horns part) only...

                    ...wool from a coarser batt studded with multi-colored cotton dots.


                                         After flipping the project to side two...


                                                       ...silk gauze is added...


                                     ...the wool 'rays' from side one are folded in...


                        ...and layers of superfine merino and batt are added, as before.


                                                 The project is wetted out...


                      ....and colorful bands of pre-felt are layered onto the wool surface.


                                      Next time: further embellishment and felting!