Mid-way through felting...
...you can see the piece starting to shrink on the resist.

...you can see the piece starting to shrink on the resist.

After removing the resist...
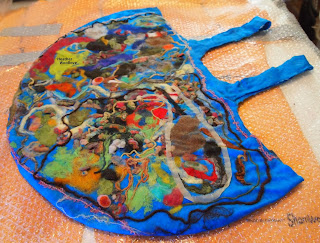

and turning the project 'right-side' out.


Additional rolling from side to side...
...reduces the width of the tote's 'mouth' and makes it a more appealing shape.

...reduces the width of the tote's 'mouth' and makes it a more appealing shape.

Side one with raw locks...


Close-ups...


...of the bag's texture.


Many of you know how very much I enjoy working 'inside-out'...
...and this project is a good example of 'why?'!
Even with all of the synthetic add-ons and partially felted bits...
...working in this manner kept them all in place!
Next time: the finished tote...
...and a few more close-ups of the fun stuff! :)

...and this project is a good example of 'why?'!
Even with all of the synthetic add-ons and partially felted bits...
...working in this manner kept them all in place!
Next time: the finished tote...
...and a few more close-ups of the fun stuff! :)

4 comments:
Love the design and colors of this!
How can you tell when the right stage of felting has been reached, and you can take out the resist without risk of the two sides felting together?
I can see the wonder of your doing inside out! Truly colorful and beautiful!
Thanks, Kelly!
Rachel-it's an 'experience thing' for the most part, but it's after the piece passes 'the pinch test'...where you pinch it to see whether the individual fiber layers have become 'one cloth'. :)
Terriea-thank-you! Bold colors, as you know, are a lot of fun for me! :)
Post a Comment