Sunday, April 25, 2010

Nonuplets Candle-Holders


I'm used to being surprised at birth...

...since my last child turned out to be my last two children during delivery.

Well, it happened again...

...except this time, 8 turned into 9.

I'm sure you must have guessed by now that these gifts are candle-holders...

...and once I got started making them, I just couldn't stop.

I made earth-toned ones resembling geologic formations for some...

...and brightly colored, vibrant ones for others.

I found glass candle-holders which just fit inside the openings...

...although as you may have noticed...

...using different fibers resulted in each being slightly different in size.

Luckily, this will be the only time they're displayed as a collection...

...inviting comparison!
Posted by Picasa

Octuplets-More Process Pictures


Since I wanted these items all to be a bit different...

...to better reflect the various decorating styles and color preferences of their recipients...

...I used different fibers and add-ons for each one.

I laid out the design, first, on my resist...

...wool yarn for some, sari silk fibers and cut-up pre-felt for others.

Then covered the designs with several layers of wool...

...and felted them as usual, until they held together and passed the 'pinch test'.

I cut flaps into the center of one side with sharp scissors...

...and pulled out the resist, then continued the felting process.

When they were pretty well felted on one side...

...I turned them 'right-side out' and finished the other.

Once rinsed and spun dry in my salad spinner...

...I placed a small teacup saucer in the bottom of each felt ball...

...and inflated a Gertie ball in order to shape it.

More photos presently...

Posted by Picasa

Friday, April 23, 2010

Octuplets-Preparation


Posted by Picasa


You may have noticed that I don't really enjoy making more than one of a kind of something...

...manufacturing items would make this felting thang less fun for me and more like work. Shudder.

But, occasionally, you just have to 'tough it out' when faced with a need...

...like when I made all of us new Christmas stockings last year.

I needed eight somethings for a Women's Weekend event...

...as gifts for women friends whom I've known and loved for over twenty years.

So, I spent quite a few hours cutting small remnants of pre-felt into bits...

...julienned strips and a small dice that reminds my daughters of a bowl of multi-colored salsa! :)

I had been reading about the use of a salad spinner for removing excess water from small felted projects recently...

...and boy, does that work well!!

I'm sure some of you can guess what these turn out to be...

...but the rest of you will have to wait for the reveal...

...next time!

(Giggle)

Wednesday, April 21, 2010

Part Two-'Sandwich' Table Runner


To complete this runner, I added some dyed flax fibers...

...to the top of the white wool.

I just love the way flax keeps a certain 'integrity of shape'...

...while felting fully into a piece.

It's a great way to add a punch of color to a felted item.

I was relieved to see that my runner fully felted...

...and the synthetic side did show off the colored piles of fiber well.

I should have added a second layer of white wool to the surface, though...

...since I did have a little 'poke through' of the cut up bits of yarn in one spot.

The good news is that it forced me to embellish for once...

...and I added a little embroidery to the wonky section.

I have to admit that I didn't enjoy the process all that much, though...

...natural fabrics certainly nuno felt much more easily!

I think I will keep the synthetics for smaller sections of projects in the future...

...like in this bag...

...where they really add interest and texture.


Posted by Picasa

Monday, April 19, 2010

'Sandwich' Table Runner-Part One


I've been fiddling around with synthetic fabrics lately...

...trying to figure out when they work in felting and when they don't.

When I found this soft and lovely, pale chartreuse lace...

...I wanted to see whether it would work for a nuno felt piece.

First, I laid out the fabric...

...then placed little mounds of different chopped up bits of fibers on it.

I hacked up pieces of silk scarves, leftover silk selvage strips from my dye pots and various hairy and fringy yarns...

...piling them in different color sections in a checkerboard-ish design.

I applied green wool around the perimeter of the runner...

...and topped it all with a layer of white wool.

At this point, I was crossing my fingers, hoping that it would felt together...

...and not end up as one giant bag of fabric confetti!

More next time...

Posted by Picasa

Friday, April 16, 2010

Project X BAG (Quelle Surprise!)


Once I had decided to make (yet another) purse with this felt...

...and had drafted a working pattern (don't ask!)...

...I was still on the fence about which side to use as the bag's exterior.

I am not much of a blue person...

...and I really, really love the way the silk laps felted into the wool...

...they're so richly textured, they look almost tumor-like to me.

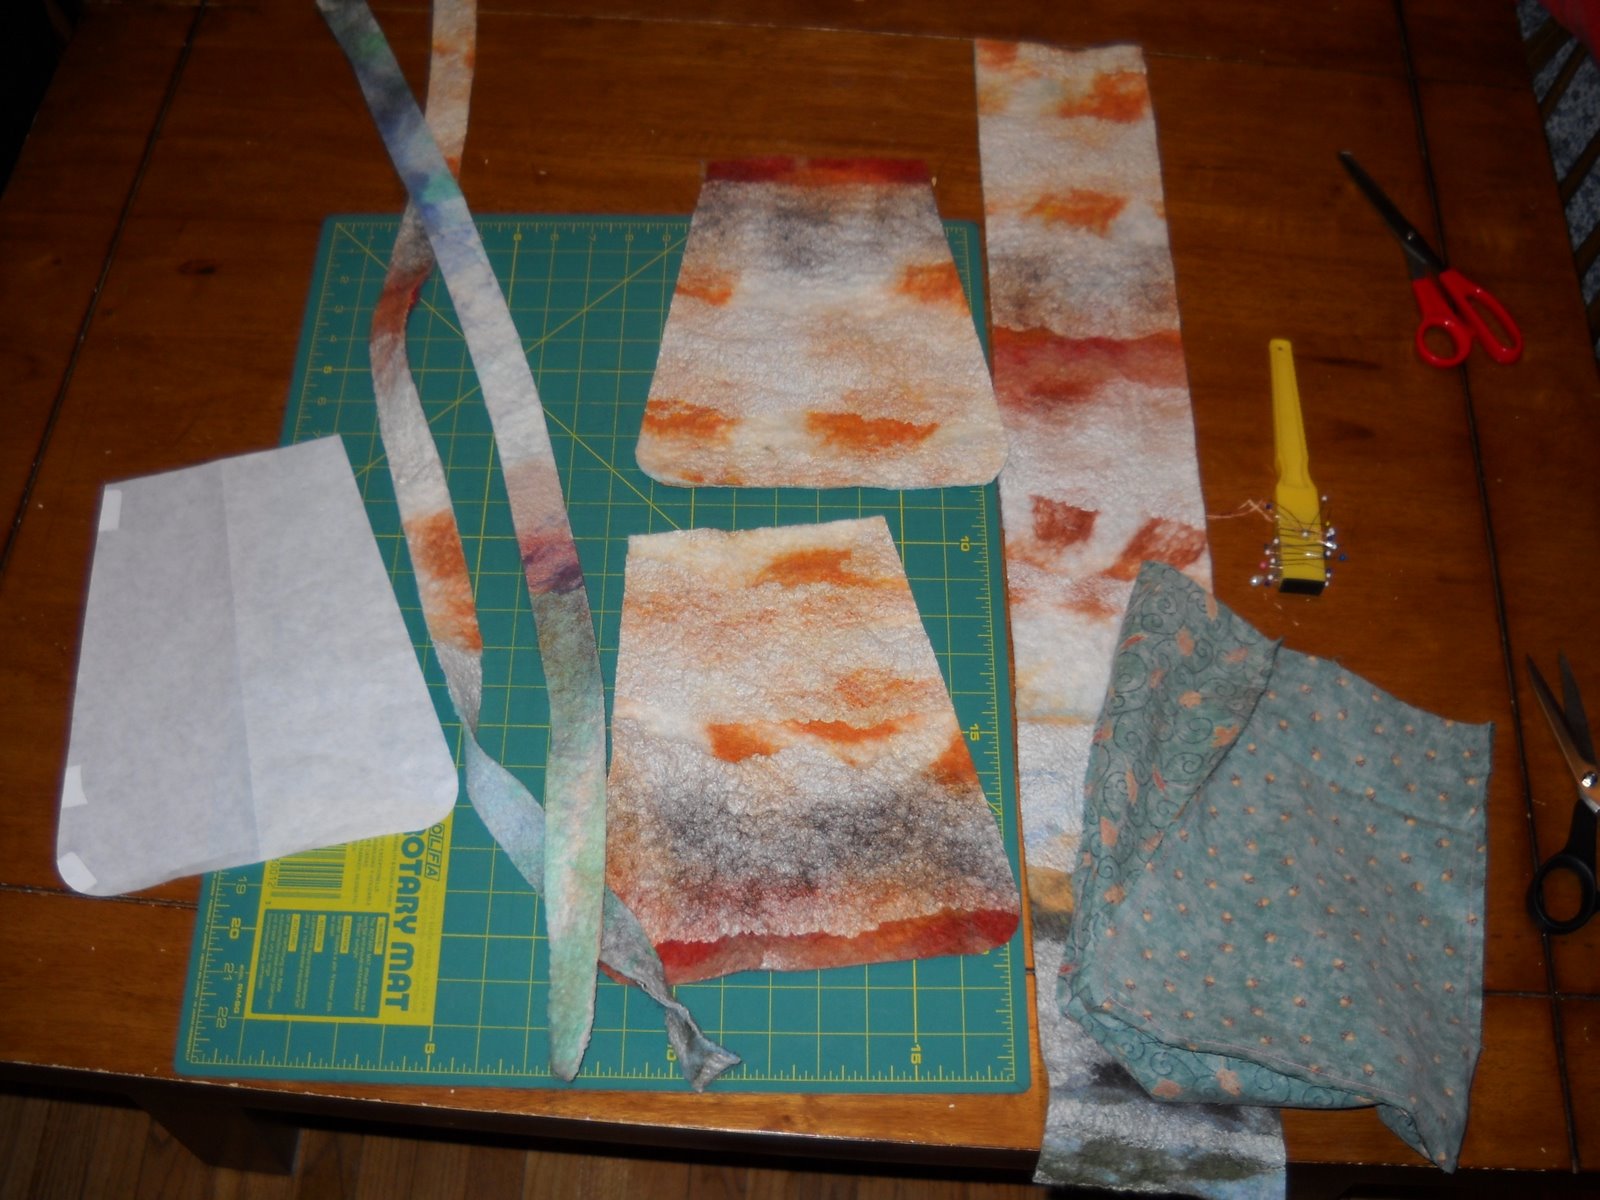
So, having decided on the 'right' and 'wrong' sides of the felt, I began cutting...

...making one 5-inch strip for the bag's sides...

...and two pod-shaped pieces for the front and back.

I also cut two long, thin pieces for the straps...

...and merely seamed them together, 'right' sides out.

I made a lining from two coordinating fabric patterns from my stash...

...and cunningly (I thought) sewed little fabric 'packets' for two super strong earth magnets...

...that I sewed into the lining for use as a closure. (Much cheaper than the fabric store ones!)

I sewed the bag together 'seam-allowance-out'...

...for a little more textural interest.

Now that I have a working template...

...I may make more of these...

...next time, with pockets! (I forgot them this time!)


Posted by Picasa

Thursday, April 15, 2010

Project-X-us Interruptus


I'm putting the finishing touches on my Project X Flat Felt piece...

...and just to keep you in suspense for one more day...

...let me present to you my Flower Bag with its new straps.

First, I removed the re-purposed single belt strap (see top photo)...

...by snipping the hand-stitching that held it to the bag (easy-peasy).

Then, I used my rotary cutter to slice it into 1/2-inch wide lengths...

...and sewed each end (firmly) to a small piece of fabric.

Next, I machine stitched the fabric 'tapes' to the bag, and voila...

...it's much more user friendly, I think.
Posted by Picasa