Showing posts with label mules. Show all posts

Thursday, September 6, 2012

More Slipper Fun-This Time With Raw Wool Accents

Putting raw locks onto the resist...

 
...then covering them with orange wool...

...and a layer of red burlap on each sole.


A white wool dot keeps me from cutting into the wrong side when removing the resist.
 
The mostly felted mule, turned right-side out.

 
My daughter, L, in her new slippers...

 
...which are slightly wild-looking...

 
...but fit perfectly. :)

 
Thanks for the great idea, Nicola!


My friend Nicola made the pair that inspired these while we were in Portugal...

...using white Icelandic fleece and brown wool roving.


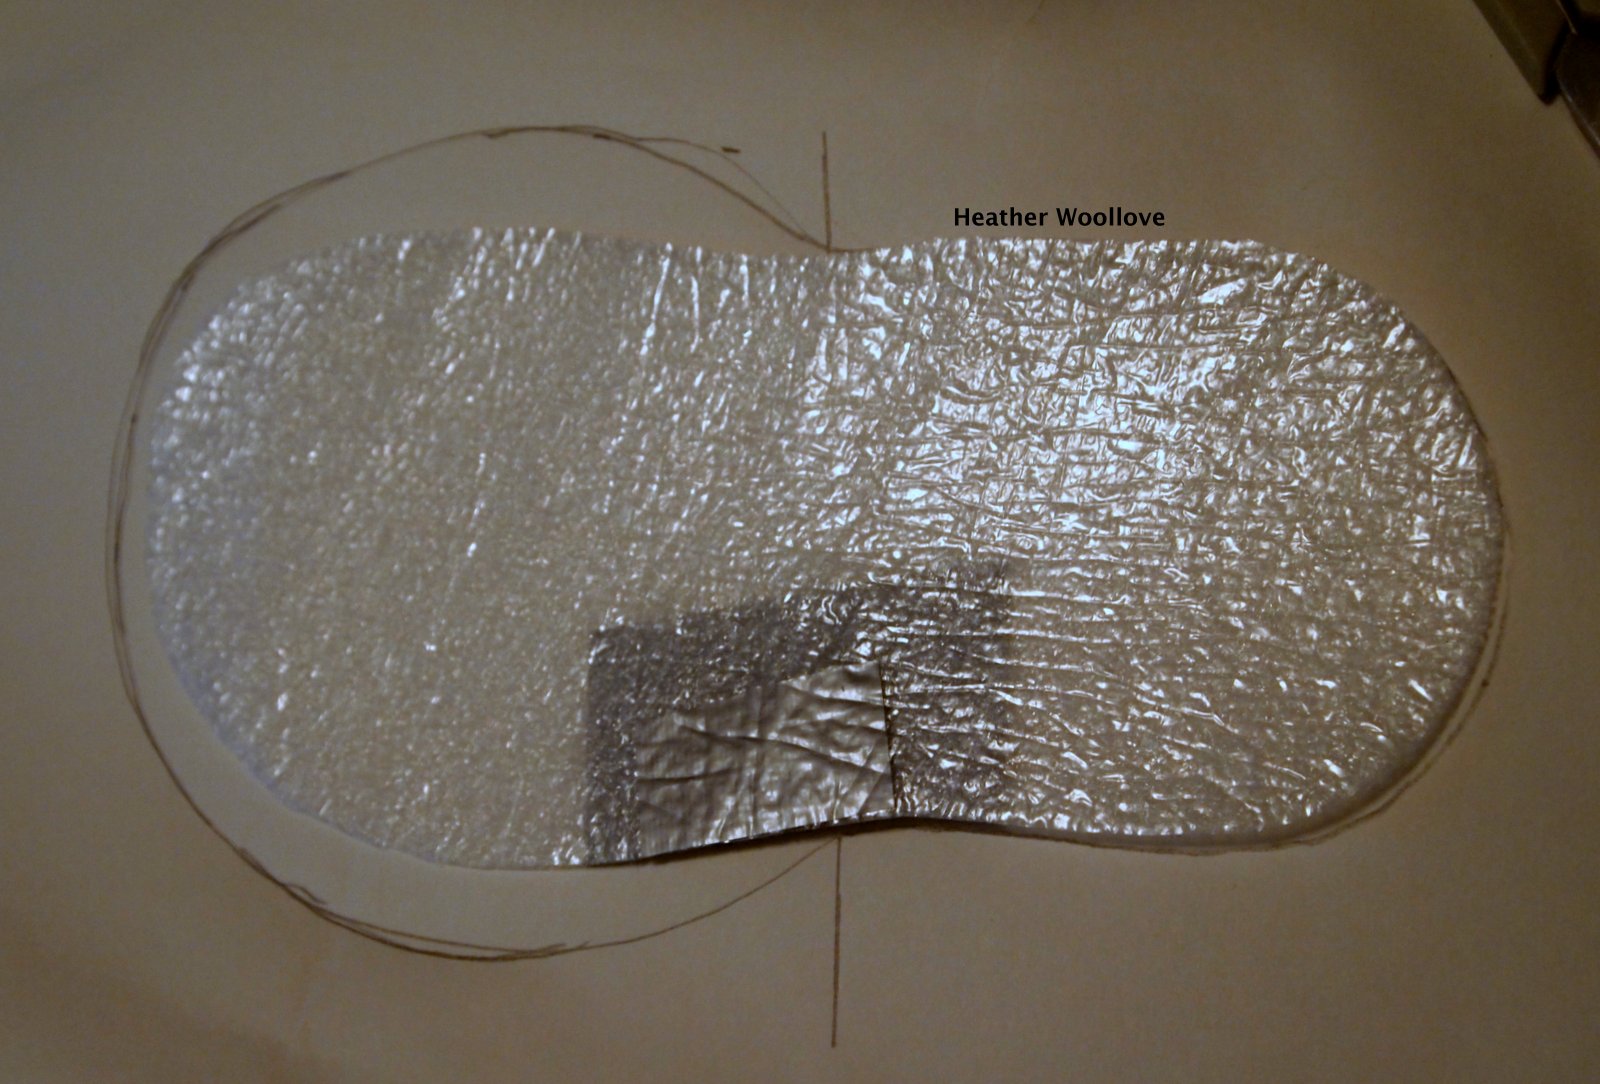
After making a foam resist by tracing around my daughter, L's feet...

...and adding approximately 1/2 inch extra all around the heel area...

...and 1 inch extra all around the front of the foot where the mule 'upper' would be...

...I set to work.

Using a wool batt with multicolored cotton dots...

...and sandwiching in a layer of red burlap on the bottom of each mule...

...I hoped to avoid the slipperiness of my earlier attempts.

I postulated that a lightly-covered piece of rough burlap...

...might provide a safer sole...

...but, alas, I covered it with too much wool...

...and negated its potential effectiveness.

(When I try it again, I'll let you know how and whether it works...

...unless one of you wants to try it in the meantime and let me know?!?) :)

Because the locks hadn't been cleaned prior to use...

...they stayed 'boingy' and separate throughout the felting process...

...and my daughter thinks that her new slippers are quite fun to wear!!

Posted by Picasa

Sunday, August 12, 2012

Green Pre-Felt Embellished Slippers

Laying out a pre-felt design on one slipper...

 
...and its negative on the other!


Covering each resist with green wool roving. 
 
Cutting out the resist and turning the slippers right-side out.

 
Mid-way through felting...


...and on my darling daughter's feet!
 
Green is her color, so I knew that these would be a hit!

 
The finished slippers.

 
Having sorted out the size and shape issues with my own slippers...

...it was time to make a pair for my daughter, H-2.

Since she is a green lovin' gal...

...it was easy to decide which color to use for hers! :)

Using a technique that I used on this purse some time ago...

...I cut a positive and a negative design from one piece of pre-felt.

Working in all green wool...

...the color gradation is very subtle.

I'll bet that some lively designs could be had...

...if boldly contrasting colors were used, instead!

Posted by Picasa

Wednesday, August 1, 2012

"Slip-On" Felt Mules- Pair 3 of 3


I replicated my earlier pre-felt embellishments...

...because I liked how cheerful they looked when felted.

 
I covered them with aubergine roving this time, though....

...and used pieces of leftover art batt for the inner layers.

Cutting both slippers at once (and working alone) = two matching slippers this time! Grin.
 
One mule turned right-side-out and one still inside-out.

 
Working the cut edges of the felt in order to seal them.

 
The "Three Bears" of slippers...

...one is too small, one is too flimsy...


...and one is just right!

 
These are exactly my size, and are sturdy enough to be functional...

...plus, the vamp comes up high enough on my foot that they actually stay on while walking!

 
'The third time's the charm'?

It turns out that making slippers to fit my size 9 gunboats...

...requires 40 grams of wool per mule.

I've since made a green pair for my daughter (with only one minor adjustment)...

...but I'll give you a break in my next post...

...and show you something new!

Posted by Picasa

Monday, July 30, 2012

"Slip-On" Felt Mules- Pair 2 of 3

Altering the size and shape of the original resist.

 
Adding external slipper details to the resist surface...

...since I'm working inside-out again.


Adding a dot of color to the sole surface helps me to remember which side is which.
 
Tucking the 'heel' bit under the resist and healing the cut edge of the felt.

 
Rubbing one nearly finished slipper on a glass cutting board in order to shape it.


Uh, oh...what happened here?!?!  


A not intentionally-mismatched pair of mules.
 
Error notwithstanding, I did manage to get a nicer shape this time...

...and more coverage for my foot.

 
After drafting a new resist for my second slipper attempt...

...I rummaged through bags of pre-felt scraps for ideas.

Using 'cut out' bits, leftover from my Centipede Scarf...

...I laid a bright design on the surface of each resist.

I must confess that because my friend, Linda was here, working with me that day...

...I was laughing too hard to pay the requisite attention to my project when I cut into slipper number two. :)

If you look closely, you'll notice that I didn't use enough wool for the second pair, either...

...and will need to add more layers next time, in order to make them as thick and sturdy as pair number one.

Next time: both form and function come together.

Posted by Picasa

Saturday, July 28, 2012

"Slip-On" Felt Mules- Pair 1 of 3

A slipper template was made by drawing around my foot...

...and adding an inch all around.

 I then used it to cut out pieces of cotton gauze and foam underlayment.

 
Covering the first foam resist with bits of a blended art batt.


Encasing a piece of cotton gauze in the sole for durability.


After felting to the 'pinch test'...

...I cut the slipper in order to reposition the resist.

 
Felting now continues with the 'heel bit' underneath the plastic.

 
The finished slippers.
 
 I hand-stitched the 'flaps' down with strong beading thread to make them more comfortable.

 
My daughter, H 2, modeling this slightly too small first pair.

 
Whenever I've made felt slippers in the past...

...it's always been 'bootie style' ones that must be pulled on.

Because I prefer the kind that slip on and off quickly...

...I end up giving most of my handmade slippers away.

So, when I saw Nicola make a fun pair of mules. recently...

...I decided that they would be well worth a try!

Since it was just an experiment, I hastily drew template patterns...

...and covered the resists with wool from an art batt that I had hanging around.

I felted each slipper until it held together...

...then cut into the felt and sealed the raw edges.

Finishing them with the 'heel bit' under the plastic helped to create the desired shape...

...and, once rinsed and dry, I stitched the loose flap to the insole of each slipper.

Finding that this pair was slightly too small for me...

...and wanting a vamp that covered more of my foot next time...

...I had a better idea about how to draft a new template and where to cut the felt.

Next time: why talking and laughing with a good friend while cutting into your felt...

...might lead to a less than perfect outcome! Grin.

Posted by Picasa