Showing posts with label domestic wool roving. Show all posts

Tuesday, March 31, 2015

"Bricks and Mortar" Pillow- Part 1 of 3

Tearing cotton scrim fabric...


                                                 ...into long, narrow strips.


                                          Laying out a thin layer of wool roving...


                                       ...and topping it with the torn fabric strips...

                                                   ...in a geometric pattern.


                                                  Covering the entire project...


                                         ...with layers of black wool from a batt...

                                                     ...and then wetting it out.


                                             Flipping the project to side two...


                                                   ...after rubbing for a time.


                                                 The dark side of the piece.


                                                Next time: the felting continues.

Tuesday, December 3, 2013

"Disaster Struck" Yarn-Embellished Tote- Part 2 of 2

Wetting out side one.

 
Laying out side two...

 
...and making the tote and handle edges nice and neat.

 
After felting for a time.

 
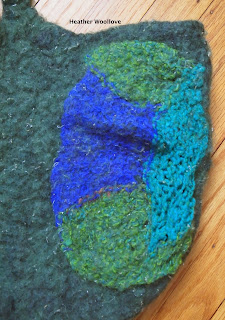
The (very terrible) finished tote...

 
...which lost quite a few of its knitted bits during felting...


...and ended up felting to a weirdly soft and pilly consistency. 
 
Close-ups of some of the (sad-looking) felted-in bits of knitting.

 
During felting...

...this tote never really came together. :(

Many of the knitted pieces 'popped off' as I worked...

...and I struggled so to get this wool to felt...

...that I finally threw the whole thing into the dryer to finish it up.

The resulting felt is quite soft and strange...

...with lots of pilling.

It really looks like something that's been knitted and fulled...

...and then 'abused' for a long time. Sighhh.

Next time: a project that I love! :)

Posted by Picasa

Sunday, December 1, 2013

"Disaster Struck" Yarn-Embellished Tote- Part 1 of 2

Pinning knitted pieces...

 
...to the surface of my resist...

 
...as an embellishment...

 
...including some that I made with pearl cotton thread...

 
...and others made with hand-spun wool, synthetic yarns or silk blends.

 
Covering side one with dyed domestic wool roving.

 
I even ran a knitted piece up the tote handle!

 
Side two...

...with more of my free-form knitted pieces.

 
I absolutely love sheep and wool festivals...

...for the staggering variety of wool roving that's available (among other things)!

I like to purchase roving that comes from domestic breeds and is hand-dyed by artisans...

...and mostly, this works out very well.

Sometimes, however (like this time)...

...I end up with roving which is not at all good for felting. :(

For this tote, I repeated the process that I used here...

...but with much less favorable results.

Next time: the finished tote...

...and the sad way that this roving felted.


Friday, November 29, 2013

'Sparkling' Wine Tote- Part 2 of 2

Cutting wide 'U's' for the handles...

...prior to further felting.

 
The flower accents in close-up.

 
The back of the finished tote...

 
...with its festive surface!

 
The wine tote in use.

 
See how it shimmers and shines?...

 
...just perfect for carrying bottles of 'bubbly' to a holiday party! :)
 
Posted by Picasa

Monday, March 5, 2012

Wet-Felted Studio Curtains- Part 2 of 2


One completed curtain...


...with sunlight shining through it.


Another finished valance...


...and one window-sized curtain.


A close-up view of the inclusions, back-lit by the sun...


...including a bit of an unfinished crochet project that I found in a thrift store.


A slightly thicker curtain, made in a similar fashion, was made for the room next-door.


Three of the four finished studio curtains.


As I was working on the curtains for the studio...

...I decided to make an additional one for the room next door, as well.

I guess I figured, "In for a penny, in for a pound!!" :)

It's a slightly thicker twin to the one in my studio...

...and these two oddly placed windows were once niches for room air-conditioning units...

...in the days before 'central air'.

I think you'll agree that the curtains look best with sunlight shining through them...

...but regardless of the time of day, they certainly have made a nice change in the studio.

Posted by Picasa

Saturday, March 3, 2012

Wet-Felted Studio Curtains- Part 1 of 2


'Log cabin quilt' valances from my days as a 'sewist'.


Laying out one layer of domestic wool roving...


...and adding silk yarn, tussah silk, lace, and pieces of silk fabric. 


During fulling...note the shrinkage!


After ironing and drying.


Pinning and marking stitching lines for the rod pocket.


All ready to sew!


I have four studio windows...

...that were sorely in need of new curtains.

I had been musing about this project for some time, but without a clear direction...

...and then came the votive candle holders at Christmas-time!

It suddenly struck me that this sheer, white, luminous look was what I was after, all along...

...and I knew exactly what I needed to do!

Since I wanted 'unfussy' valances with irregular borders...

...(I had had enough geometry with my quilt-block ones)...

...I decided to use domestic wool roving that I had on hand.

It's a bit rough and not pure white in color...

...and I love the little 'hairy bits' that I found in it while felting. :)

Instead of placing the embellishments on the outside of the felt, like I did with the votive holders...

...I 'sandwiched' them between two thin layers of roving, instead.

I used small bits of any white or off-white fiber, fabric or yarn that I found in my stash...

...and placed them roughly parallel to each other during my layout.

After adding a second layer of fiber (perpendicular to the first)...

...I proceeded to felt the piece as usual.

To make the finished pieces wide enough for adequate coverage (including gathers for fullness)...

...I laid out roving two-and-a-half times the width of each window...

...and one-and-a-half times the height.

Next time: the finished valances in situ.

Posted by Picasa